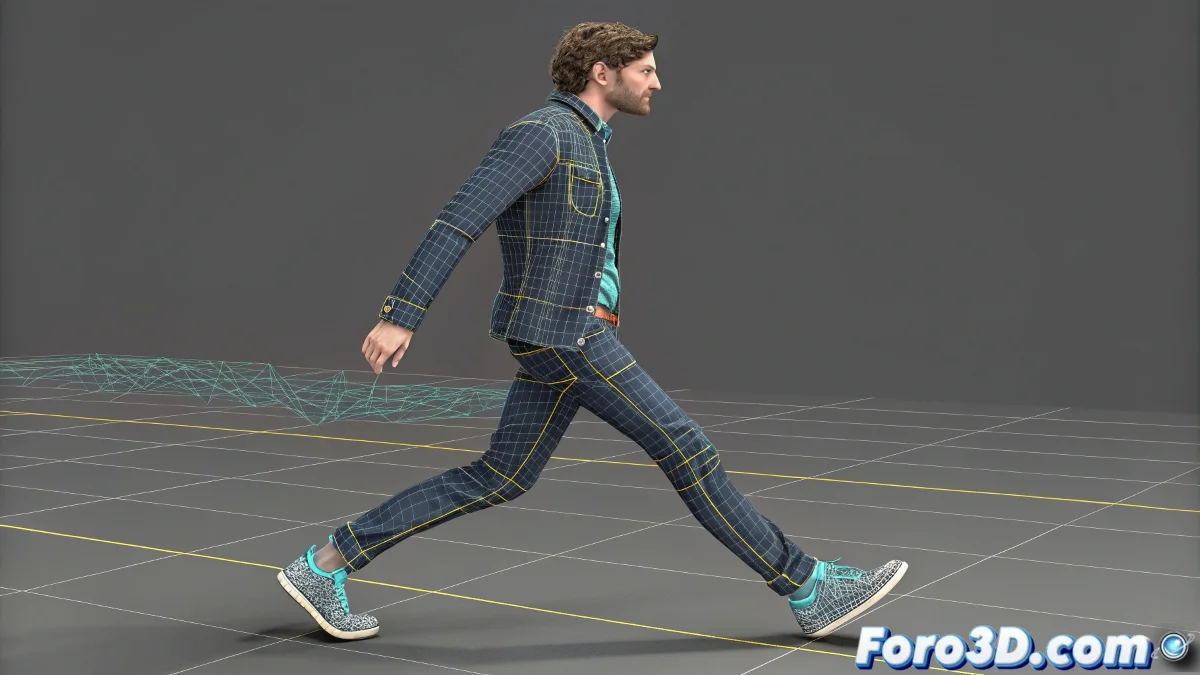
The Challenge of Keeping Feet on the Ground
Animating a walk cycle in 3ds Max with the Biped system should be intuitive, but many artists encounter the frustrating sight of feet sliding or floating over the ground as if they were on the moon 🌕. This issue is not a software bug, but a consequence of how the TCB (Tension, Continuity, Bias) controller interpolates rotations and positions between keyframes. Its pursuit of smooth curves often conflicts with the mechanical need for a foot to remain firmly planted during its contact phase.
The Heart of the Problem: TCB Interpolation vs. Physical Reality
The TCB controller is the default for Biped and is necessary for clean export to many game engines. Its job is to create smooth transitions between keyframes, but this smoothness is the enemy of foot stability. When you animate the hips with an arched motion, the TCB tries to smooth the entire skeleton, including the feet, resulting in those micro-movements that cause the heel to lift or the foot to slide a few pixels. The problem worsens in loops, where the last frame must perfectly match the first, and any imprecision becomes evident.
A floating foot is the hallmark of amateur animation; a planted foot is the hallmark of a professional.
The Native Solution: Footstep Constraints and Lock Foot
3ds Max offers specific tools within the Biped system for this exact problem. Instead of fighting against TCB, embrace it by using it correctly. Select the Biped and in the Motion panel, under the Keyframing rollout, you'll find the options for Footstep Mode. When activated, you tell the Biped that you're animating a walk cycle. Then, for each foot, use the Lock Foot button (represented by an icon of a foot with a padlock). When this option is active over a range of frames, the Biped automatically generates TCB keyframes that anchor that foot to the ground, preventing any unwanted sliding or floating.
Workflow for a Perfect Walk Cycle
For impeccable walk cycles, follow this process:
- Initial Setup: place the Biped in Figure Mode and ensure it is correctly scaled and positioned on the ground plane.
- Activation of Footstep Mode: exit Figure Mode and activate Footstep Mode. This shifts the system's mindset to step animation.
- Creation of Footsteps: use the tools to create footsteps on the timeline, defining the timing and placement of each step.
- Adjustment of Contacts: for each footstep, in the frames where the foot should be flat on the ground, select the foot and activate Lock Foot. You'll see keyframes appear on the timeline.
- Body Animation: with the feet secured, you can now animate the hips, spine, and arms freely, knowing the feet won't move.
- Export: since you used native tools, the generated TCB keyframes will be compatible with export to game engines.
Common Mistakes and Alternative Solutions
If the problem persists, check these points:
- Ghost Keyframes: sometimes unintended keyframes on the feet can interfere. Use the Track View to delete stray keyframes.
- Incorrect Keyframe Mode: ensure you're using Body Vertical and Body Horizontal keyframes for body motion, not general transformation keyframes.
- Reference Ground Plane: always work with a visible reference plane to easily visualize any floating.
- Motion Mixer for Loops: for complex cycles, create a perfect clip of a few steps in the Motion Mixer and then loop it, instead of manually animating a long loop.
By mastering Lock Foot and Footstep Mode, you'll transform your walk animations from floating and amateur to solid and professional. And when that character walks with conviction on the ground, every step will resonate with the weight and realism your animation deserves 😉.