How to Modify the Trajectory of an Animated Object in 3ds Max
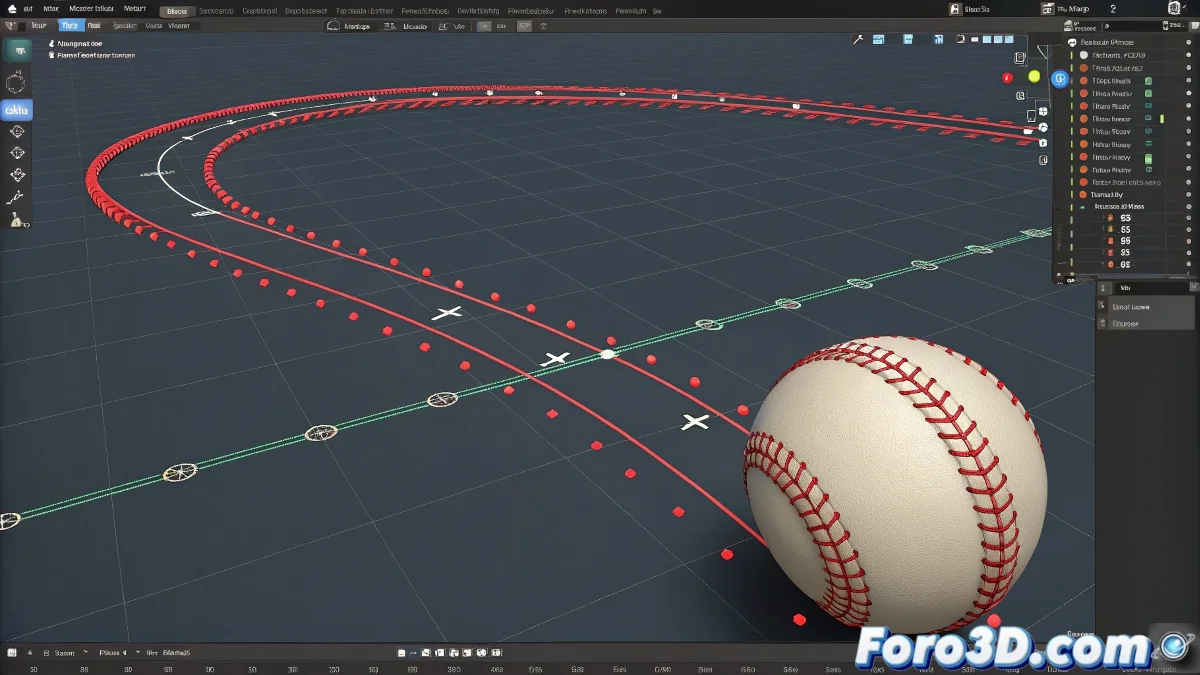
When you animate an object in 3ds Max and want its trajectory to be more curved or have a custom shape, it's not enough to just move the visible points on the red trajectory line. These points represent the keyframes and cannot be edited directly like a curve. But don't worry, you don't need to be a mathematician to achieve it! 📐
The Correct Way to Do It
To modify the trajectory of an animated object, follow these steps:
- Go to the Motion tab and find the Trajectory section.
- Right-click on the red trajectory line that appears in the viewport and select Edit Trajectory.
- In trajectory edit mode, control points (handles) will appear that you can freely move to give a curved shape to the object's movement.
By adjusting these points, you change how the object moves between keyframes, achieving more natural movements, like a ball falling in a parabola rather than a straight line.
Points to Consider
Remember that the trajectory can only be edited if you have previously set keyframes for the object's position. If you want a very smooth movement, you can also adjust the tangents of these points so the curves are not abrupt.
Another option is to use a Spline as a path and make the object follow it using a path position controller. This way you have total control over the curve from the spline.
In summary, to make your ball fall in a curved trajectory in 3ds Max, you must activate the trajectory edit mode and modify the control points that define that curve, not just the position keyframes. And remember, if the trajectory isn't smooth, you can always blame gravity! 😉
Practice and patience are essential in animation. Don't hesitate to experiment with different techniques to achieve the desired effect!