When Pores Become Pixels with Purpose
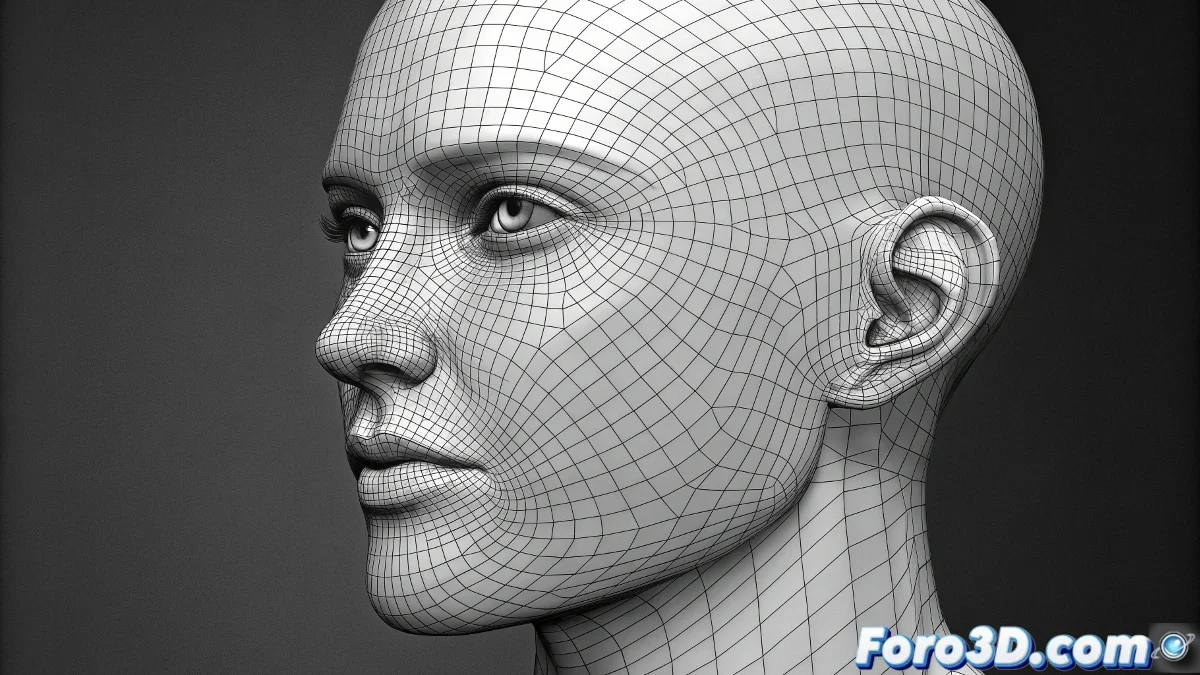
The creation of realistic skin alphas for ZBrush represents one of those technical challenges where the difference between the organic and the artificial is measured in perfectly placed pixels. Far from being simple textures, these intensity maps act as intelligent sculpting tools that transfer micro-geometry with a precision the human hand could hardly match. The problem with improvised photographs is not their resolution, but their lack of sculptural purpose - they capture skin as a visual surface, not as a three-dimensional structure.
The most fascinating aspect of mastering this technique is how it transforms your approach to organic detail. Where before you might sculpt each pore manually - a titanic and monotonous task - you can now establish anatomically correct bases upon which to build variation and character. The best alphas do not add detail indiscriminately, but rather respect the underlying architecture of muscles and bones, working in harmony with the form rather than against it.
A good skin alpha is not seen, but its absence is noticed
Sources and Acquisition Strategies
- Specialized Marketplaces for scientifically scanned alphas
- Free Resources from digital sculpting communities
- Custom Creation in Photoshop with total control
- Layered Combination to avoid repetition
The Art of Acquiring What is Already Perfected
Investing in professional alpha packs from sources like 3D Scan Store or XYZ Textures represents the most direct path to dermatological realism. These textures, often derived from high-precision 3D scans or scientific macro photography, capture skin not as a flat surface, but as a complex three-dimensional ecosystem. What distinguishes them is not just their resolution, but their intelligent anatomical organization - specific sets for the forehead, cheeks, nose, and other areas with distinctive pore characteristics.
For limited budgets, communities like Polycount offer hidden treasures created by artists who understand the specific needs of digital sculpting. These resources, while possibly less exhaustive than commercial solutions, often come with the added benefit of tutorials and implementation examples from the very community that created them. The key is to look for files in lossless formats like TIFF or PSD that preserve all the dynamic range needed for micro-detail sculpting.
Creating from Scratch in Photoshop
- Grayscale Workspace for pure intensity
- High Pass and Emboss Filters for detail extraction
- Aggressive Levels Adjustment for sculptural contrast
- Export Without Compression to preserve quality
When custom creation is necessary, Photoshop becomes your texture laboratory. The process begins by establishing a grayscale workspace where black represents minimum depth and white maximum elevation. The High Pass filter is particularly valuable for isolating medium-high frequency details from existing photographs, while Emboss can transform flat images into relief maps with direction and depth.
In Photoshop, a perfect alpha is 99% contrast and 1% magic
The Science of Application in ZBrush
The import into ZBrush marks the transition from flat image to sculpting tool. From the Alpha / Import panel, the prepared files are loaded into the library, ready to be assigned to any brush. True mastery, however, lies in the strategic selection of the brush and application mode. While