In this article, we will explore the process behind creating a stunning 3D ruins scene. From sculpting the terrain to adding details and texturing, this project shows how to blend creativity and modeling tools to achieve an impressive result. Let's get started!
Step 1: Sculpting the Terrain
To bring our scene to life, we began by sculpting the terrain. We took a cube and subdivided it, then activated dynamic topology in sculpt mode to shape it. We used a human mannequin as a scale reference to ensure the proportions were correct. After finishing the terrain sculpture, we were ready to add the ruins.
Step 2: Creating the Ruins
There are several ways to approach creating the ruins. One option is to use an asset pack, but we decided to create individual mesh pieces and sculpt them by hand. This approach may be less efficient, but it allows for customizing the pieces and giving each one a unique touch, which adds realism and authenticity to the scene.
Useful Tip
To create circular objects, we used the Simple Deform modifier set to "Bend." This makes it easy to create circular shapes and allows for easy adjustments without losing quality.
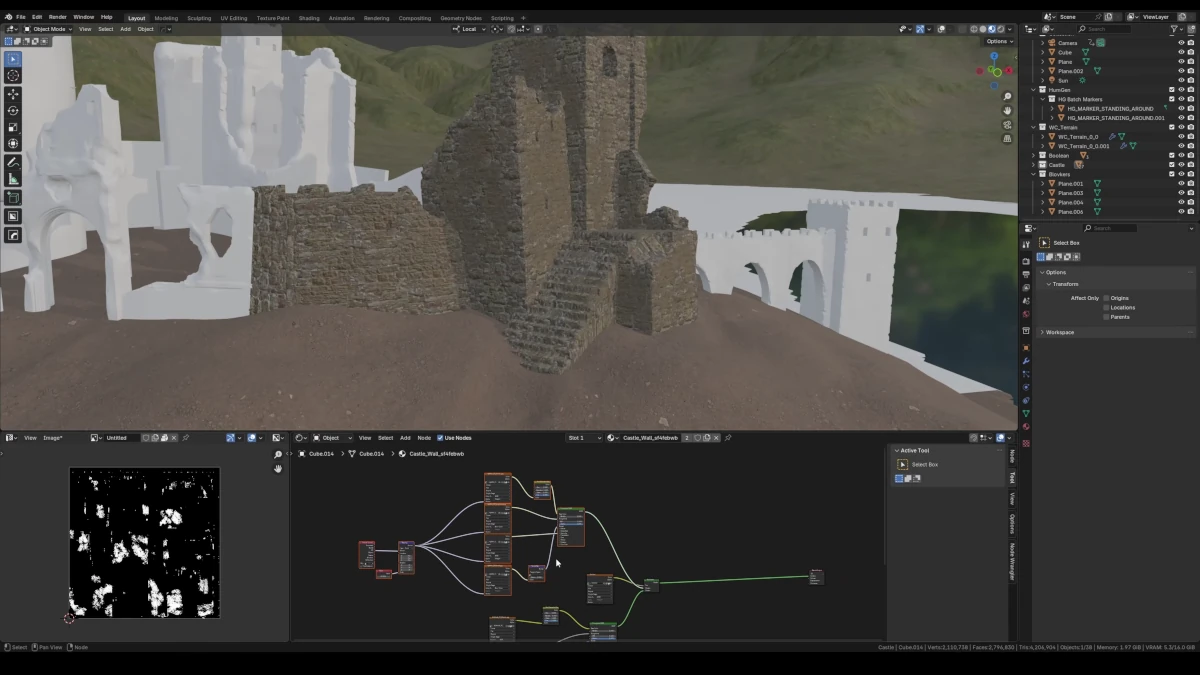
Step 3: Adding Details to the Ruins
To give the ruins more complexity, we used booleans to cut the walls and create more interesting shapes. Then, we added a displacement modifier to spheres to add additional details. This approach generates realistic shapes that complement the overall structure of the scene.
Step 4: Lighting and Composition
Lighting is key to creating the right atmosphere. We placed a soft sun for more dramatic light and adjusted its angle to cast shadows from the back of the scene. Additionally, we incorporated mountains created in World Creator to help frame the composition.
Using HDRI to Enhance the Environment
We added an HDRI to light the scene and used the color saturation node to adjust the tone, as the shadows were too cold. Then, we created cloud shadows using light blockers and noise textures to give depth to the scene.
Step 5: Texturing
Texturing is the next important step. First, we applied a PBR grass shader to the ground and mountains, using textures from Quixel Bridge. For the ruins, we initially tried a stone texture, but upon applying it, we noticed it didn't look good, so we opted to use a 2K texture and combined it with others for better results.
Texturing Details
We used texture paint mode in Blender to add variations and additional details. To create a more realistic effect, we used nodes like the Blender eraser generator to add grunge and ambient occlusion effects on the surfaces.
Step 6: Fine-tuning Lighting and Shadows
The next step was to adjust the lighting to create a more dramatic atmosphere. To do this, we used the blackbody node in the sun's color, which allowed us to use physically correct values for the light. We also added area lights with a warm tone to illuminate the darker areas we wanted to highlight.
Final Result
After hours of work, the scene began to take shape. From sculpting the terrain to the smallest details, each step contributed to creating a unique atmosphere. In the end, the ruins look organic and natural, and the overall composition has great visual strength.
Conclusion
Creating a 3D scene like this is not just about technical skills, but also about creativity. By exploring different techniques and tools, we were able to transform a simple idea into an impressive work. If you want to see more detailed