Basic Rigging and UV Textures in ZBrush Well Explained
We know that ZBrush has a thousand buttons and that Pixologic (sorry, Maxon now) sometimes doesn't help much with its... poetic logic. If you're trying to do rigging inside ZBrush and also apply a UV texture painted in Photoshop, it's normal to end up feeling like you're sculpting with hot chewing gum. But don't worry: we'll go step by step with updated tools.
Rigging inside ZBrush: Transpose Master and ZSpheres
Although ZBrush is not software designed for professional rigging (like Maya or 3ds Max), it does have a rudimentary system that can help you pose your character without leaving the program. This system is based on ZSpheres as a skeleton, and it's useful for posing sculptures before exporting them to software with a real skeleton.
Basic Steps for Rigging with ZSpheres
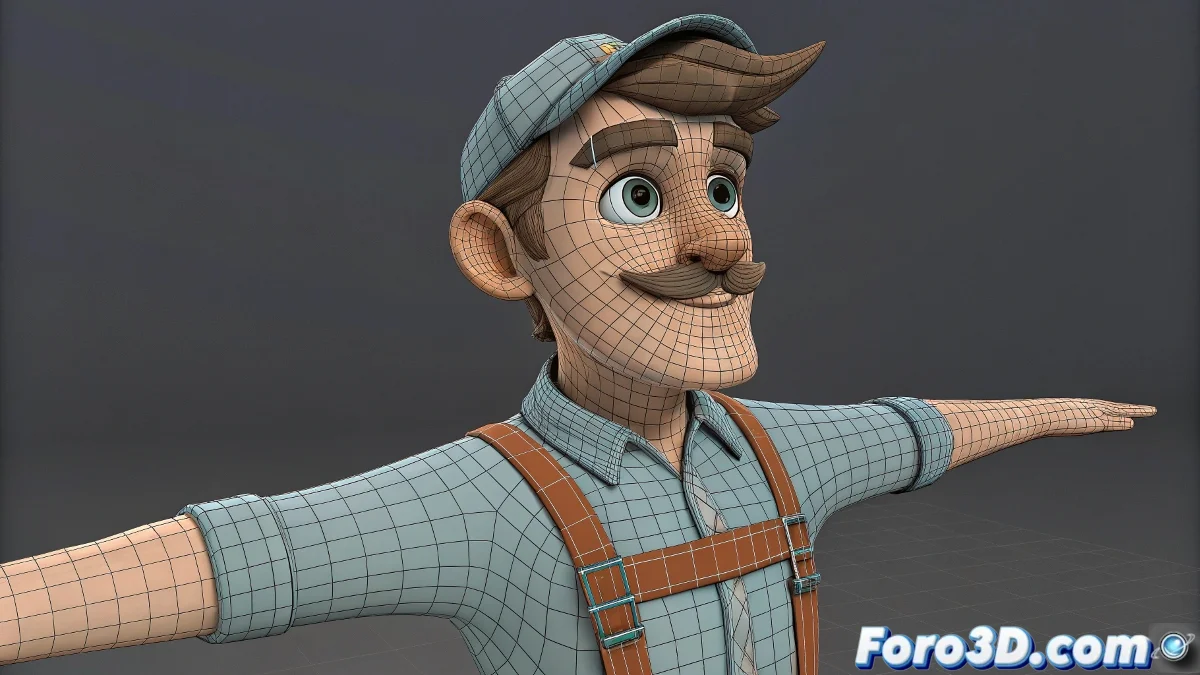
- Load your finished mesh: And with subdivisions.
- Go to ZPlugin > Transpose Master > T-Pose Mesh:
- Now create ZSpheres: From Tool > ZSphere, and start building a skeleton over your model.
With the skeleton ready, select Tool > Rigging > Select Mesh and load your mesh. In Tool > Bind Mesh, activate the bind so that the model adheres to the skeleton. Pose the ZSpheres and watch how the mesh deforms. When you're done, go back to Transpose Master and select Transfer to Subtool.
This system is ideal for static poses or silhouette tests. But if you plan to animate in 3ds Max with V-Ray, the best thing is to export the mesh and rig there using Biped or CAT, especially if you'll use V-Ray as the final render engine.
UV Texture in Photoshop and How to Load It in ZBrush
Once you've generated the UVs in ZBrush (ideally with UV Master or via ZRemesher + unwrap), and painted the texture in Photoshop, it's time to apply it back.
Steps to Apply Your External Texture
- Go to Tool > Texture Map:
- Click in the empty space: And select Import, find your edited image.
- Once loaded: Make sure the UV channel is correctly activated on the mesh.
If you want to see how the texture looks interactively, go to Tool > UV Map and adjust the UV size (for example, 4096). You can also convert the texture to Polypaint from Polypaint > Polypaint From Texture, useful if you want to continue painting on top.
Exporting to 3ds Max with V-Ray
When you have the character ready with texture and pose, you can export it with GoZ directly to 3ds Max if you have both softwares updated. Or manually from Tool > Export, in OBJ or FBX format, with the maps exported separately from Texture > Export.
Inside 3ds Max, create a VRayMtl, load the texture into the Diffuse channel (or Base Color if you use PBR), and you'll be ready to set up a render with studio lighting or HDRI.
They say that ZBrush doesn't need bones because everything flows like putty… until you want to move a finger and your face stretches. So if at any moment you feel that rigging in ZBrush is like tap dancing on an escalator, you're not alone.