Reviving Classics with 3D Printing 🏍️
If you're restoring your Yamaha RX100 97 model and looking for the side fairings, you belong to a growing club of enthusiasts who turn to 3D printing when original parts are impossible to find. Programs like Blender 4.1, Autodesk Fusion 360, or ZBrush 2025 allow modeling these parts with surprising detail, capturing exact curves and anchorages for a perfect fit. The path isn't always easy—scans are rarely available—but the result is worth every hour of modeling.
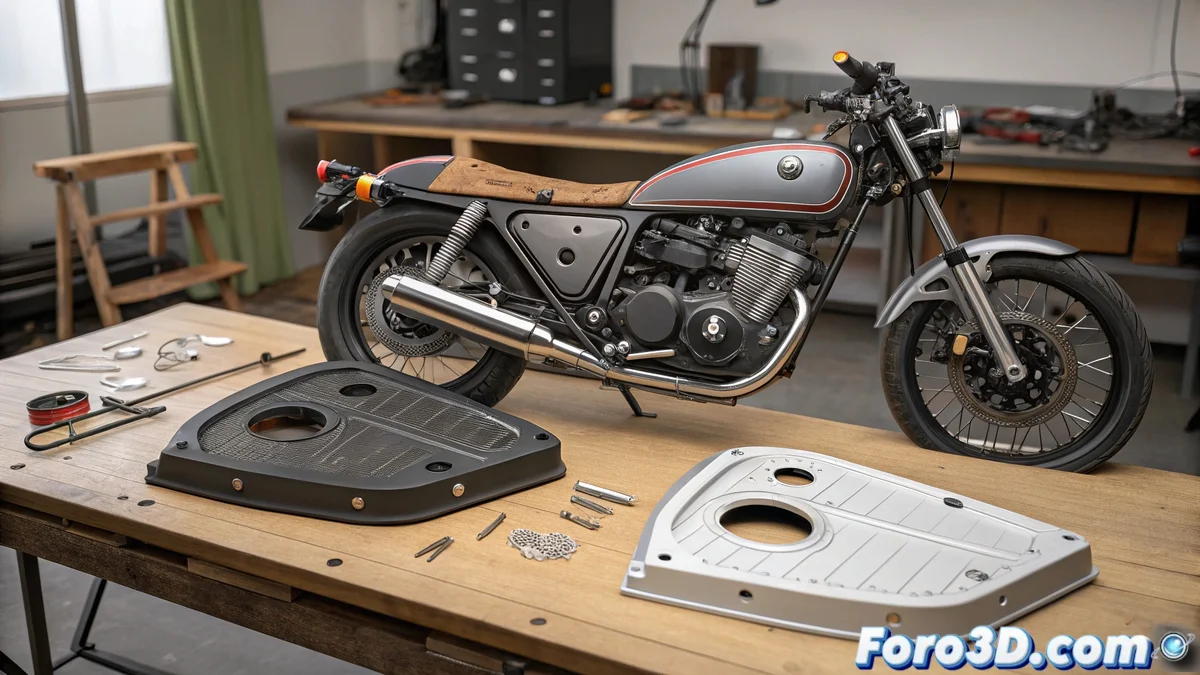
Scanning and Preparation Process
If you have an original fairing in good condition, 3D scanning greatly accelerates the process. Using a scanner like the Creality CR Scan or photogrammetry apps on smartphones with RealityCapture, the base geometry is captured. This raw scan is imported into Blender or Fusion 360 for cleanup: removing artifacts, filling holes, and correcting deformations. Tools like Remesh or Sculpting help reconstruct damaged areas, while Boolean operations ensure that the anchorage holes match those on the bike. 🔧
Modeling from Scratch with References
When there's no original part to scan, modeling from scratch is the option. It starts with reference photos aligned in orthographic views in Blender. Using NURBS curves or polygonal modeling, the main silhouettes are traced, extruding and adjusting until achieving the 3D shape. It's crucial to constantly verify measurements with calipers or technical drawings if available. Modifiers like Subdivision Surface smooth the curves, while Solidify adds uniform thickness to the part.
Modeling a fairing is not just recreating a shape; it's capturing the ergonomics of a biker era.
Preparation for 3D Printing
Once the model is ready, it is exported to printing formats like STL or OBJ. In slicing software like Ultimaker Cura 6 or PrusaSlicer 3.6, key parameters are adjusted:
- Orientation to minimize supports and maximize strength
- Infill density (15-25% for balance between weight and durability)
- Layer height (0.2mm for fine details, 0.3mm for quick prototypes)
- Brim or raft to improve adhesion to the heated bed
The choice of material—PLA for ease or PETG for impact and heat resistance—depends on the planned use.
Iterative Testing and Adjustments
No model is perfect on the first try. Printing a low-quality prototype (0.3mm layer height, 10% infill) allows checking the fit on the bike without spending much time or filament. Common adjustments include:
- Enlarging screw holes for printing tolerance
- Increasing thickness in mechanical stress areas
- Modifying anchorage angles for better alignment
These iterations ensure the final version fits like a glove.
Post-Print Finishing
After printing the definitive version, roughness is sanded with progressively finer grit sandpaper (from 120 to 600). For a professional finish, modeler's putty is applied in thin layers, sanded again, and painted with automotive spray paint matching the bike's original color. Optionally, a clear coat protects the color and adds shine.
While your Yamaha RX100 regains its 90s glory, your 3D printer proves that sometimes the future is the only way to preserve the past. And if the cat tries the fairing as a scratching post, you can always print one for him too… in bone-colored PLA. 😅