Simulate an Impact and Its Deformation in Houdini
Creating the effect of a hit and the dent it leaves in Houdini requires combining rigid body dynamics with deformation techniques on the geometry. The process starts with a high-definition mesh for the object that will receive the damage. 🛠️
Prepare the Collision System
The core of the method is an RBD solver. Here, the impacting object is defined as an active rigid body, while the target can be passive or capable of fracturing. It is vital to adjust parameters such as mass and friction. To make the contact leave a permanent mark, a constraint network (Constraint Network) is implemented using Glue type joints that break when exceeding a defined force, allowing the geometry to yield right in the impact area.
Key steps for the simulation:- Use an RBD Solver to handle the movement and physical interaction between objects.
- Configure the body properties for realistic behavior during the impact.
- Apply a Constraint Network with breakage thresholds to control where and how the damage occurs.
The real challenge is not simulating the collision, but later justifying to the client why the final render took three days and the dent looks like a simple scratch.
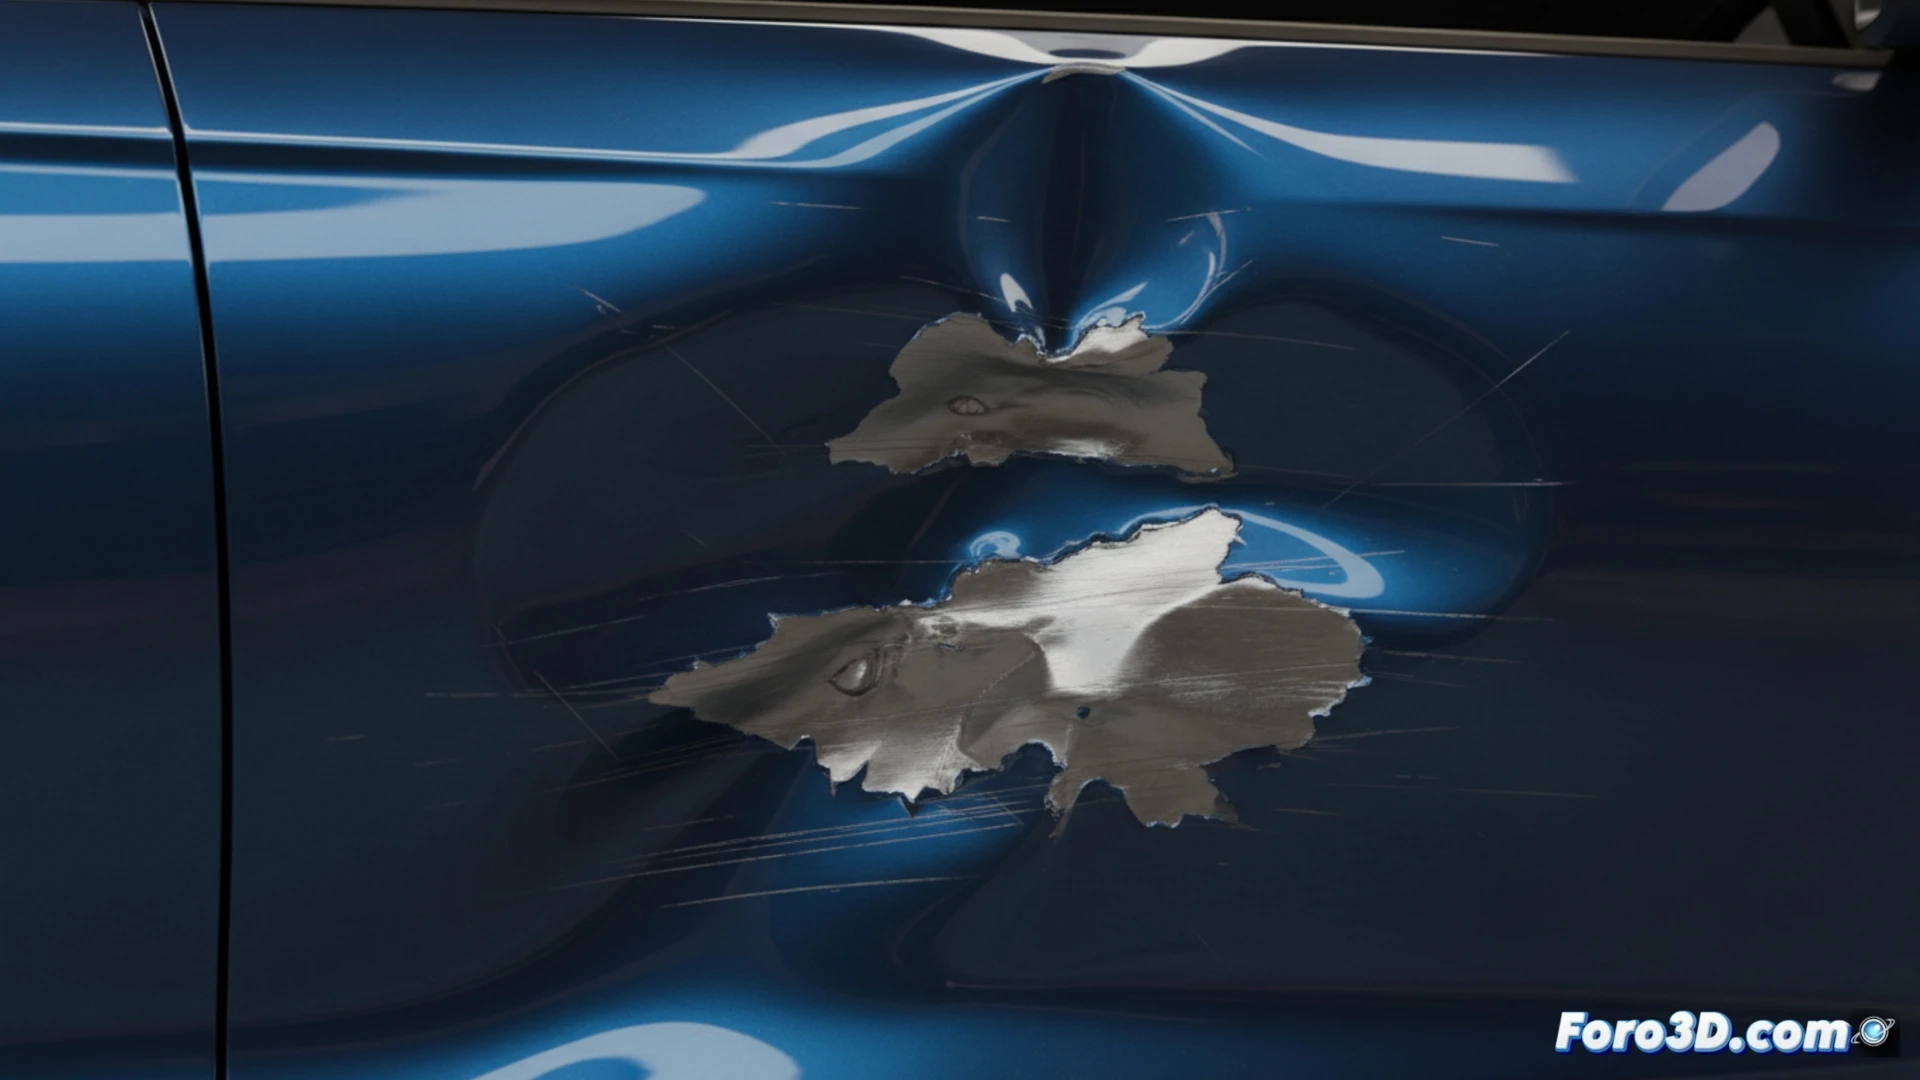
Create the Dent Geometry
Once the impact occurs, work on the damaged object's mesh to form the depression. An effective workflow involves converting the geometry to a volume using VDB from Polygons. Then, with a VDB Reshape SDF node and a mask that isolates the impact area, push the surface inward. Another approach is to use an Attribute Wrangle to directly manipulate the point positions based on their distance from the impact epicenter, adding noise to give the dent an irregular and organic detail.
Methods to generate the deformation:- Convert the mesh to a distance field (SDF) with VDB to deform the volume non-destructively.
- Use VDB Reshape with a spatial mask to localize and sculpt the dent.
- Program in an Attribute Wrangle the displacement of points, enriching the result with noise patterns.
Integrate and Optimize the Result
The final success lies in well integrating the two steps: the dynamic simulation that dictates the force and location, and the deformation operation that executes the morphological change. It is crucial to test with proxy geometries to iterate quickly before moving to the high-resolution mesh, thus managing the computational cost. The goal is to achieve a convincing dent that justifies the simulation and render time. 💻