UDIM Workflow for High-Resolution Textures
In the production of visual effects and assets for video games, handling extreme resolution textures is a technical challenge. The UDIM (U-Dimension) workflow offers an elegant solution by distributing a model's UV coordinates across multiple independent texture spaces, known as tiles or tiles. Each tile is a separate texture file, avoiding processing a single impossibly sized file 🧩.
How does UDIM nomenclature and structure work?
The key to the system lies in a strict naming convention. Each texture is named including a unique numeric identifier, such as diffuse_1001.png. This number corresponds to a specific UV coordinate space. The base tile, typically 1001, covers the standard UV range from 0 to 1. The next tile, 1002, covers from 1 to 2 on the U axis, and so on. Programs like Mari, Substance Painter, or Unreal Engine automatically interpret this scheme and assemble the tiles over the 3D model.
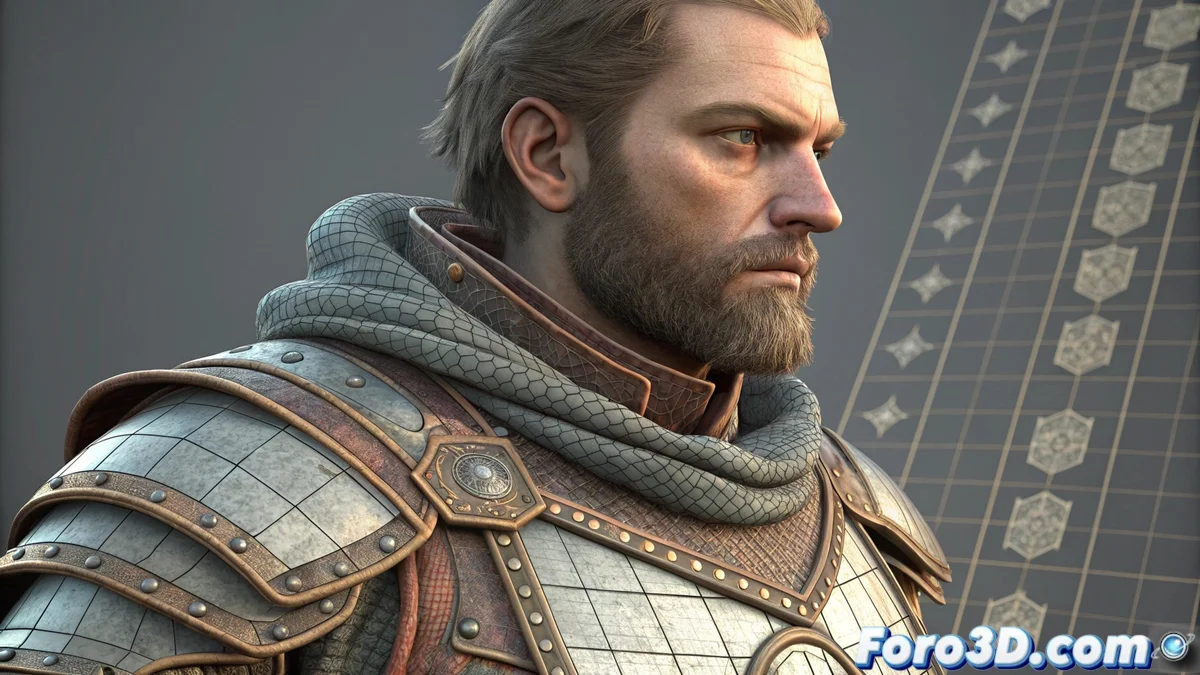
Key advantages of using UDIM tiles:- Extreme resolution per section: Artists can paint each area of the model with the maximum necessary resolution, avoiding stretching or compressing pixels in complex areas.
- Efficient memory management: The render engine or game only loads the tiles visible in the camera into RAM, dramatically optimizing resource usage.
- Standard in cinema and AAA: It is the preferred technique for creating assets where every detail, like pores or scratches, must be visible up close.
UDIM transforms a scale problem (a giant file) into an organization problem (several manageable files).
Optimize detail without overcomplicating
Separating UVs into tiles allows unprecedented control over the level of detail. However, a common mistake is thinking that more tiles is always better. Poorly planning the UV layout can turn a model into an impossible-to-follow and paint puzzle of tiles, adding unnecessary complexity to the pipeline.
Software that supports UDIM:- Substance Painter/Designer: Standard tools for painting and creating materials with native support.
- Autodesk Maya & 3ds Max: With appropriate settings and plugins for importing and rendering.
- Blender (with add-ons): Although native support has improved, some workflows require add-ons.
- Unreal Engine & Unity: Game engines that load and assemble tiles in real time.
Implement UDIM in your pipeline
To implement this workflow, start with a logical UV unwrapping, assigning areas of similar importance or detail to the same tile. Use tile 1001 for the main areas and expand only when strictly necessary. Remember that the goal is not to fill a model with tiles, but to distribute resolution intelligently to achieve maximum visual impact with the best efficiency. Mastering UDIM is essential for any artist seeking to produce cinematic-quality assets 🎬.