Subsurface Scattering: The Magic of Light Inside Materials
Achieving authentic-looking materials like skin, wax, or fruit in a 3D render goes beyond a good diffuse map. The secret lies in simulating a fascinating physical phenomenon: subsurface scattering (SSS). Unlike a simple glow, this technique recreates the intricate journey of photons that penetrate the surface, scatter inside the object, and emerge at a different point, generating that warm, translucent glow that defines the organic. Understanding this internal dance of light is the first step to mastering it digitally, whether with a slider in your favorite render engine or programming your own shader. ✨
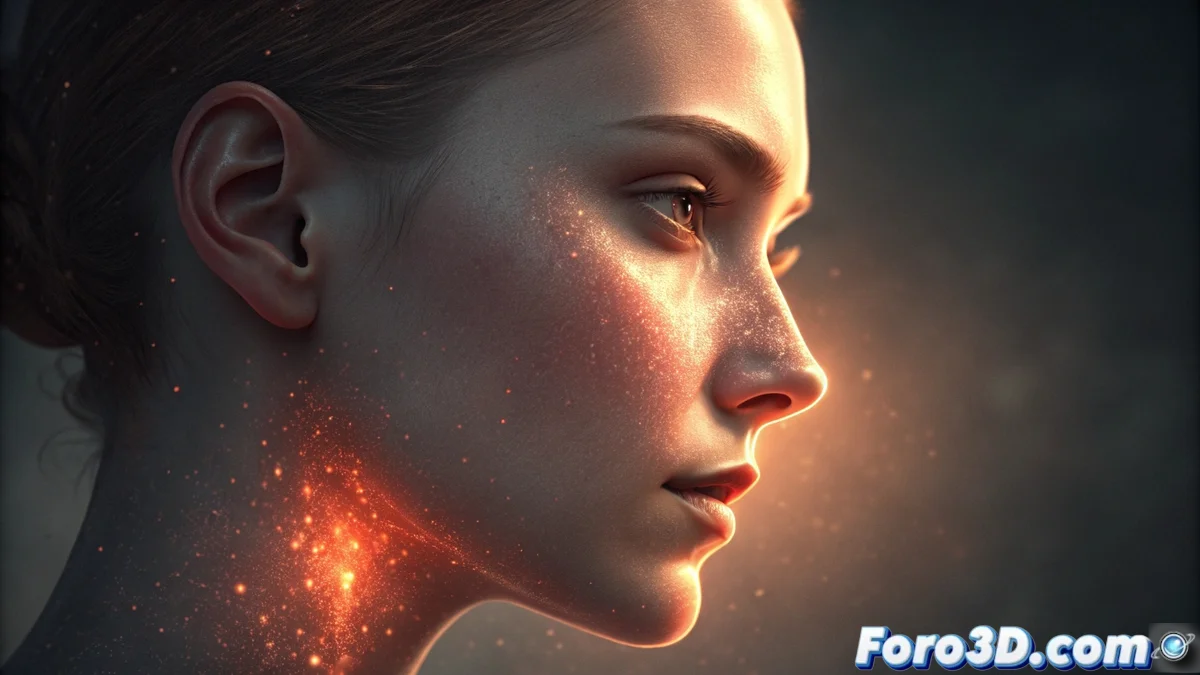
From Physical Concept to Digital Tool
At the heart of any 3D SSS implementation are specialized algorithms that calculate how light attenuates and changes color beneath the surface. Two parameters are the pillars: the scattering distance, which controls how deep the light can travel (short for wax, longer for marble), and the scattering color, which defines the tint with which the light finally exits, like the blood-red under skin or amber in honey. To guide these calculations efficiently, artists use techniques like the thickness map, which identifies the thinnest and most translucency-prone areas, radically optimizing render times without losing an iota of credibility. 🧠
Fundamental Parameters for Controlling SSS:- Scattering Distance: Defines the average depth of the light's journey inside the material. High values simulate dense materials like alabaster.
- Subsurface Color: The tone that light acquires when absorbed and re-emitted. It's crucial for differentiating a grape from a wax ball.
- Thickness Map: A grayscale texture that tells the engine where the model is thinnest, channeling the effect to specific areas like eyelids or earlobes.
The true success of subsurface scattering comes when a viewer looks at your render and only sees natural skin, without being aware of the complex simulation behind it. It's the art of going unnoticed.
Practical Strategies for Impeccable Results
Mastering this technique requires a methodical and observant approach. The best recommendation is to start with preconfigured values for material types (skin, wax, vegetables) and then refine based on real photographic references, especially under side or backlighting (rim light) that reveals the effect most clearly. It's a mistake to apply scattering uniformly across the entire surface; the key to realism lies in concentrating the intensity in anatomically thinner areas or those rich in blood vessels. Meticulous observation of how light interacts with fruit in a window or your own hand in front of a lamp is the best school possible. 👁️
Tips for Efficient and Believable Implementation:- Use Test Lighting: Place a strong light behind or to the side of your model to evaluate and adjust the scattering effect in real time.
- Hierarchize Zones: Apply more SSS intensity to ears, nose tip, finger joints, and leaf edges.
- Balance Performance-Quality: Use thickness maps and control SSS sampling quality to keep render times manageable in complex scenes.
The Reward of Invisibility
The journey to master subsurface scattering can be technically demanding, full of fine adjustments to curves and maps. However, the greatest reward is paradoxical: that your work goes unnoticed. When someone comments on how healthy the character looks in your render or the juicy texture of a fruit, without mentioning the "scattering technique," it's the unequivocal sign that you have successfully replicated the subtle magic of light in the physical world. You have made simulation become perception, and that is the ultimate goal of any digital artist seeking organic realism. 🏆