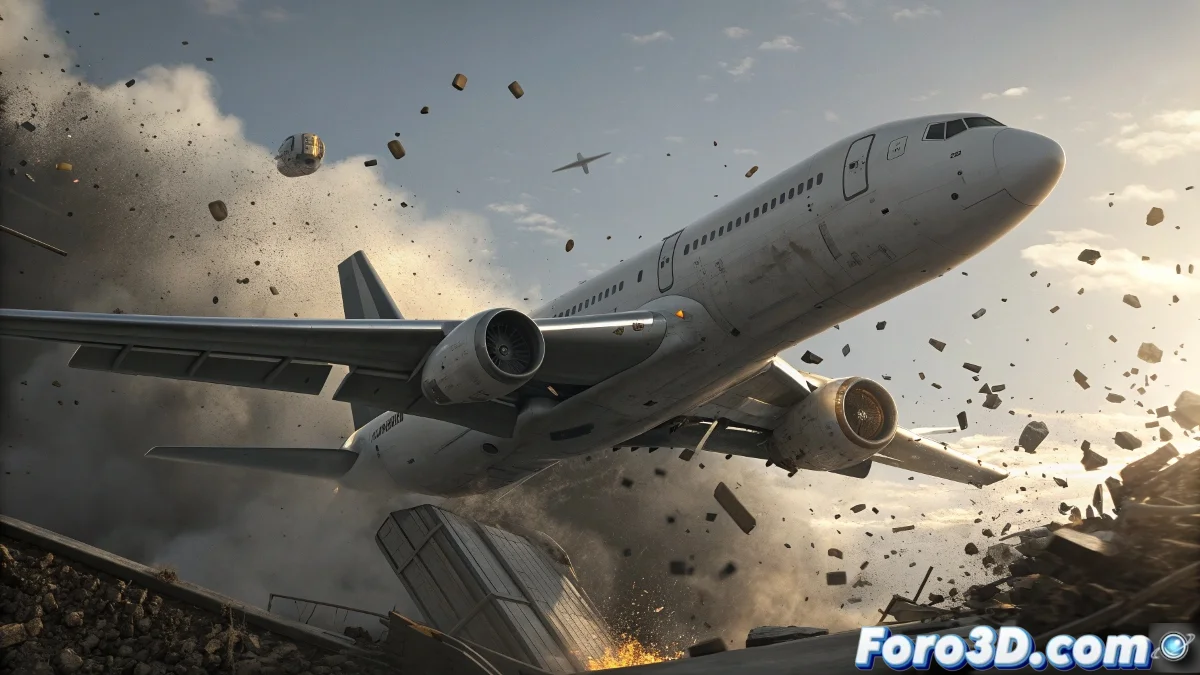
When Airplanes Decide to Disassemble in Mid-Flight
Controlled airplane destruction in animation is one of those challenges that separates beginners from professionals. Your approach with the boolean for the crack and wing replacement is solid for projects with time constraints, but there are alternatives that can significantly elevate the realism of the effect. The key is understanding that destruction is not an instantaneous event, but a progression of structural failures.
The transition between keyframe animation and dynamics approach you propose is spot on, but it can be refined to avoid that abrupt change that reveals geometric replacements. The magic lies in making the viewer never detect the exact moment when the predefined animation gives way to physical simulation.
Improvements to the Replacement Approach
Instead of a simple complete wing replacement, consider using a destruction layers system. You can model three states: intact wing, wing with visible cracks but still attached, and completely separated wing with internal fracture geometry. The transition between these states can be animated using morph targets or procedural deformers.
For the impact moment, instead of suddenly changing the entire wing, you can use a Shell modifier with animated Extrude so that the crack appears to open progressively. This combined with animated Noise in the Bump channel creates the illusion of internal fracturing before complete separation.
- Multiple states of progressive damage
- Morph targets for smooth transitions
- Shell modifier for deepening cracks
- Animated textures for internal fractures
The best destruction is the one that suggests more than it shows
Detachable Pieces System
Your idea of smaller chunks in the crack area is excellent. You can implement it using Particle Flow with Shape Instance to emit pre-modeled geometric fragments. The emission should be activated just before the main impact, creating a debris cloud that precedes the main break.
For larger fragments, RayFire or tyFlow offer more precise control over fracture patterns. You can pre-fracture the critical areas of the wing and use animated constraints that break progressively during the impact.
- Particle Flow for small fragments
- Pre-fracture of critical areas
- Animated constraints for progressive release
- Variety of fragment sizes
Integration with Particle Systems
The smoke and fire mentioned by your colleague can be strategic allies to hide transitions. A FumeFX or Phoenix FD system can be emitted from the fracture points, creating a smoke curtain that disguises geometric changes. The key is synchronizing the emission with the critical destruction moments.
For sparks and small debris, a Particle Flow system with Collision Test can generate secondary impacts when fragments hit the ground. This adds that extra layer of controlled chaos that makes the destruction believable.
- Smoke emission from fracture points
- Sparks from friction in contact areas
- Secondary debris from impacts
- Temporal integration with the main animation
Optimization for Demo Reel
Since the motion will be fast as you mentioned, you can optimize using LOD (Level of Detail) in the simulations. Distant or quickly exiting fragments can have simpler geometry and less precise simulations. Motion blur will be your best ally to smooth imperfections.
For post-production, prepare separate render layers: beauty pass, depth pass, velocity pass, and specific passes for smoke and fire. This will give you flexibility in compositing to adjust timing and hide any simulation artifacts.
- LOD based on distance to camera
- Motion blur to smooth transitions
- Render passes for post-production control
- Optimization of calculations in non-critical areas
In the end, the success of your destruction sequence will depend on attention to timing and the subtle integration between all elements. Remember that sometimes less is more, and a suggested destruction can be more impactful than an explicit one. Because in the world of visual effects, the true art lies in making the impossible believable 😏