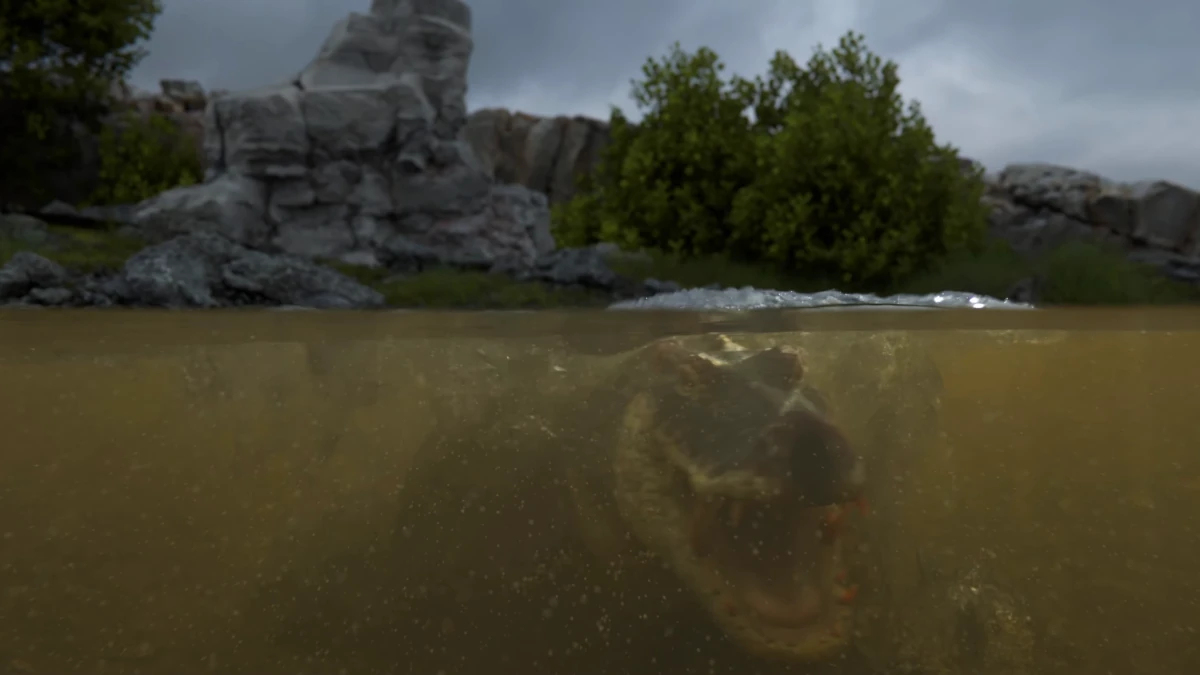
In this article, we will break down the step-by-step process to create a realistic scene of a crocodile swimming underwater, based on the impressive video by Jeremy White. Although the final result requires a lot of experience and creativity, these steps will allow you to start working on a similar simulation using Blender.
Preparing the Scene in Blender
The first step is to open Blender and create a new scene where we will perform the entire simulation. Make sure you are working with the latest version of Blender, in this case, 4.3.
Adding Underwater Vegetation
Underwater vegetation is crucial to give realism to the scene. To create the trees and bushes, you can use the Grove add-on, which facilitates the creation of plants with a natural appearance. These plants, even when submerged, help bring the scene to life.
Creating Rocks and Grass
Once you have the vegetation, you must add rocks and grass. Here, the GeoScatter add-on is ideal, as it allows you to distribute these elements in a controlled manner, adding more detail and variety to the scene. This step is fundamental for the visual richness of the seabed.
Fluid Simulation with Flip Fluids
To simulate the water in which the crocodile swims, we use the Flip Fluids add-on. This add-on is excellent for creating realistic fluids. Create a cube for the simulation domain and adjust its resolution and parameters to achieve the effect closest to real water. It is essential that the crocodile is set as "collision" within this simulation so that the water interacts correctly with it.
Particle and Foam Simulation
Just like in Jeremy White's video, particles play an important role in creating effects like water foam. Adjust the quantity and behavior of the particles so that the water moves naturally around the crocodile, making the environment more dynamic and realistic.
Achieving Underwater Caustics
Caustics underwater are a crucial visual effect that reflects how light scatters, creating light patterns on the seabed. To achieve this effect in Blender, apply a caustic image sequence to the water shader. You will do this through a texture mapping that is projected onto the water, creating the realistic light effect that so characterizes seabeds.

Creating Sun Rays Underwater
The next step is to simulate the sun rays that penetrate the water. For this, the new Fournier-Forand phase function found in Blender 4.3 is used. This algorithm allows simulating the volumetric scattering of light, creating realistic sun rays underwater. Make sure to use an appropriate volume to represent the water and adjust the volumetric shader to achieve the desired effect.
Modeling the Crocodile
Now, we move on to the crocodile. To achieve a realistic result, the model must be very precise. If you decide to model it from scratch, start with a basic sculpture and then add the fine details. If you have a pre-made model, make sure it is well rigged so you can animate it properly in the swimming simulation.
Animating the Crocodile
To make the crocodile move realistically, you need to animate it using Blender's rigging system. Create a skeleton for the crocodile and use keyframe-based animation to give it a fluid movement. It is important that the animation is synchronized with the water simulation, so that the crocodile generates natural disturbances while swimming.
Camera and Lighting Setup
Lighting is key to achieving the right look. Use a soft Sun type light to illuminate the scene diffusely, creating soft shadows. It is also essential to set up the camera well to capture the action from the most impactful angle, ensuring that the sun rays are visible and that the shadows provide the correct underwater atmosphere.
Rendering with Cycles
The final rendering is done using the Cycles engine, which will allow you to obtain exceptional quality. However, keep in mind that this is a complex simulation, so each frame may take a few minutes to render. Adjust the Cycles parameters to achieve a good balance between quality and rendering time.
Compositing and Editing in DaVinci Resolve
Once the rendering is complete, it's time to move on to compositing within Blender to make the final adjustments. Then, export the material to DaVinci Resolve, where you can perform color correction, adjust contrast, and apply additional sound and video effects.
Conclusion
Creating such a realistic simulation of a crocodile swimming underwater in Blender is a challenge, but with patience and following these steps, it is possible to obtain impressive results. The combination of add-ons like Flip Fluids, GeoScatter, and Grove, along with advanced particle simulation, caustics, and light scattering techniques, can make your scene visually stunning. Don't forget that practice is essential to perfect these processes and take your 3D skills to the next level.