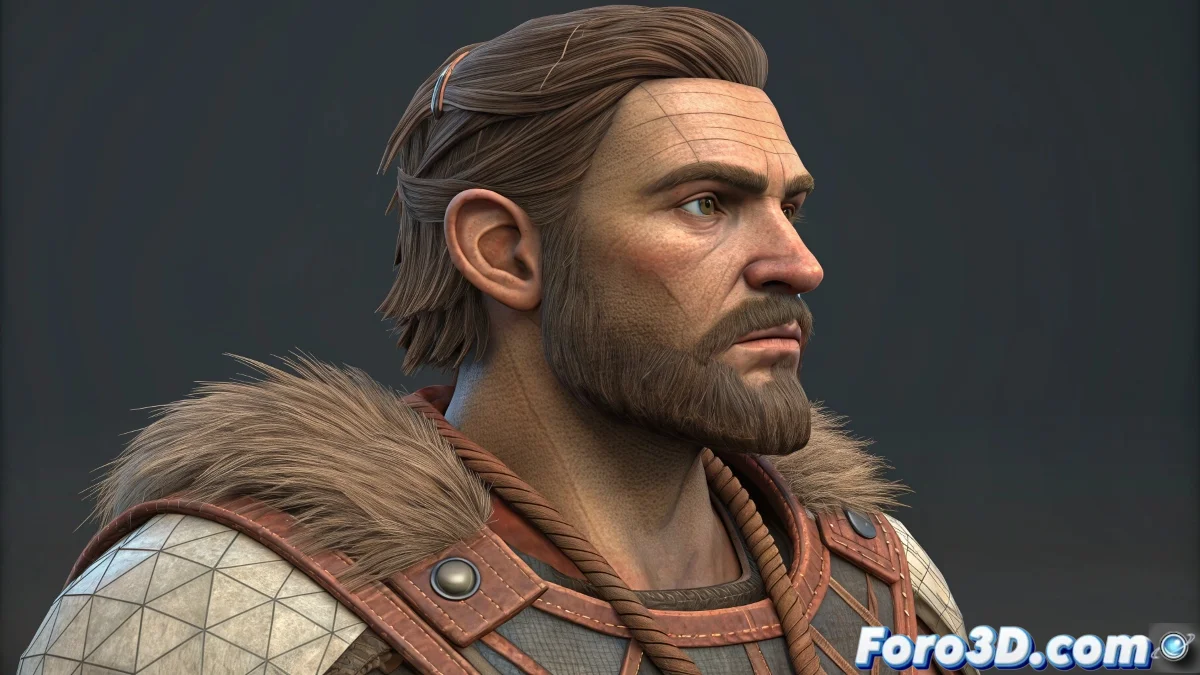
From Digital Sculpting to Smooth Animation
Transitioning a ZBrush model to animation software is like transforming a marble sculpture into an articulated puppet 🎭. ZBrush models, with their millions of polygons and microscopic details, represent the pinnacle of static detail, but require significant preparation to become animatable characters that maintain that quality in motion.
The Crucial Retopology Stage
Retopology is the indispensable bridge between the high-resolution model and the animable version. This process creates a clean mesh with topology optimized for deformation while preserving the visual appearance of the original.
- ZRemesher: Automatic tool within ZBrush for quick retopology
- TopoGun: Specialized software for precise manual retopology
- 3ds Max/Maya tools: Native retopology tools in 3D packages
- Edge loops flow: Topology that follows natural deformation lines
Good retopology is like a good skeleton: it's not seen, but it defines how the body moves.
Optimized Export and Import
The transfer process between software requires attention to formats and settings that preserve the model's integrity.
- Recommended formats: FBX for geometry and transformations, OBJ for simple meshes
- Consistent scale: Ensure units match between ZBrush and target software
- Preserve UVs: Maintain UV coordinates for subsequent texturing
- Correct orientation: Verify that the model imports in the proper orientation
Animation Workflow with ZBrush Models
Once in the animation software, the model requires additional preparation before being ready for rigging and animation.
- Geometric cleanup: Remove loose vertices, duplicate faces, and non-manifold geometry
- Final optimization: Reduce polygon count to the minimum functional
- Preparation for skinning: Ensure proper topology for deformation
- Scene organization: Name and organize elements clearly
Detail Transfer for Final Render
The magic happens when we recombine the high poly detail with the animated low poly mesh for final render.
- Normal maps: Capture surface details for real-time lighting
- Displacement maps: Real geometry deformation for offline renders
- Cavity maps: Add shading details in cracks and folds
- Multi-res workflow: Work with different resolutions according to the stage
Rigging and Skinning for Organic Models
Rigging for models originated in ZBrush presents specific challenges due to their organic and highly detailed nature.
- Precise weight painting: Careful assignment of bone influences
- Advanced deformation systems: Corrective blendshapes for problematic areas
- Facial rigging: Specialized systems for detailed facial expressions
- Secondary simulation: Cloth simulation for clothing and dynamic elements
Integrated Professional Workflow
Establishing an organized pipeline between ZBrush and animation software ensures consistent and efficient results.
And when your animated model loses so much detail that it looks like a 90s character, remember: normal maps are like digital makeup for geometry 🎨. Applied correctly, they can make a low poly model show the detailed soul of its high poly version.