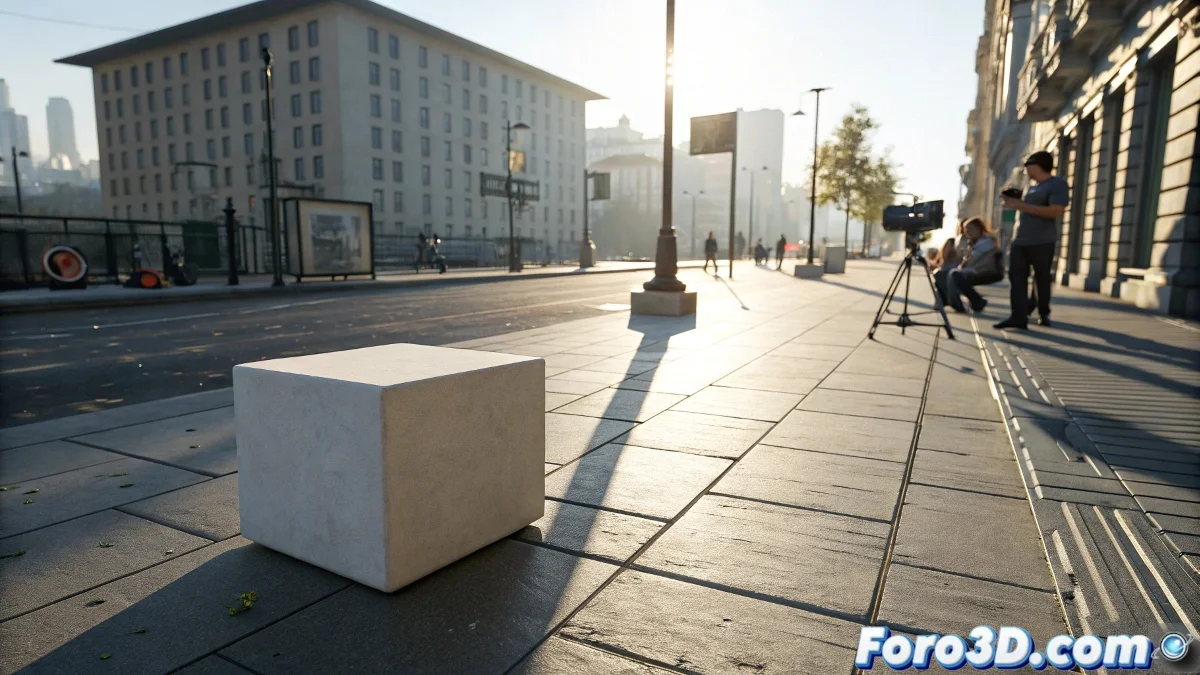
When Your 3D Shadows Scream "I'm Fake!"
Inserting 3D objects into real video is like doing magic: the illusion breaks if the shadows don't match. 🎩 Here are your professional tricks to fool even the most critical eye.
Guide to Shadows that Fool Reality
1. Lighting Replication
- Analyze angle, intensity, and hardness of the original shadows
- Use HDRI or directional lights to match the direction
- Adjust size/softness on lights to match the diffusion
2. Matte Materials Setup
- Apply Matte/Shadow/Reflection to the receiving plane
- Reduce Shadow Density (0.6-0.8 is usually a good starting point)
- Test with non-black shadow color (bluish/yellowish tones)
A perfectly integrated shadow is like a good liar: it uses real details to tell its lie.
3. Smart Rendering
- Render Shadow Pass separately
- Include Reflection Pass if the ground has them
- Use MultiMatte for selective adjustments in post
Mistakes that Give Away Your 3D
- Shadows too dark (adjust density and color)
- Edges too defined or diffuse
- Lack of ground contact (floating shadow)
Key tip: 90% of problems are solved by filming a reference sphere/chart during the shoot. The remaining 10% is pure digital art. 🎨
Now your 3D integrations will pass even the "grandma test": that moment when a non-professional can't distinguish real from rendered. And when that client says "Is this real or 3D?", you can smile with satisfaction.
Bonus tip: For irregular floors, project your video as a texture onto approximate 3D geometry. The shadows will naturally deform with the relief.