When 3D Modeling Requires MotoGP Pilot Precision
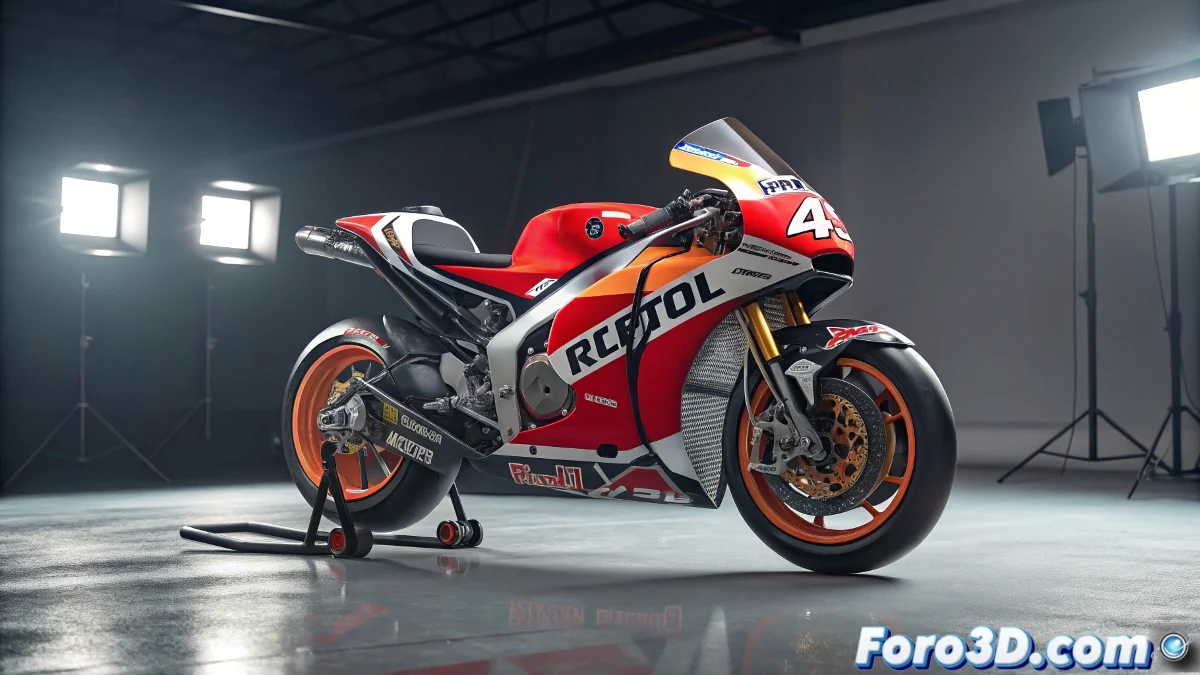
Marc Márquez dominates curves at 200km/h, but modeling his Honda RC213V in Blender is another equally technical race. Between clean geometry, aerodynamic surfaces, and materials that sweat adrenaline, this is the Grand Prix of hard surface that every 3D artist should run. 🏍️💻
The Starting Grid: Preparing the Modeling
Before touching a vertex, you need a professional reference kit:
1. Surgical Blueprints: Get orthogonal plans of the RC213V (front, side, top) and create a guide system in Blender. Use the Mirror modifier from the very beginning – in MotoGP, symmetry is sacred.
2. Technical Exploded View: Study real photos of each component: from the fairing to the perforated brake discs. Race bikes are open books of applied engineering.
3. Parts Hierarchy: Organize your scene from the start (chassis, engine, suspensions, fairing) like a mechanic would prepare his workshop.
Lap Record to Professional Modeling
Phase 1: Volume Blocking
Start with modified primitives for the main masses. The fuel tank is usually a good starting point. Apply Subdivision Surface from the beginning but keep it in Catmull-Clark mode to see the final curvature while modeling.
Phase 2: Mechanical Anatomy
Complex parts like the exhaust require:
- Intelligent mesh separation
- Strategic use of edge loops
- Controlled bevels for realistic edges
- Clean Booleans for ventilation areas
Phase 3: The Devil is in the Details
The aerodynamic fairing is your biggest challenge:
- Combine organic curves with technical cuts
- Use shrinkwrap for logos and graphics
- Add screws and rivets with Array modifiers
- Create cables and hoses with Bezier curves
Pit Stop: Materials and Rendering
A MotoGP bike is a catalog of advanced materials:
1. Carbon Fiber: Create a PBR shader with a normal map for that characteristic weave. Add wear variations near friction areas.
2. Painted Metals: Combine layers of base color, clear coat, and controlled dirt. Logos usually have that fresh vinyl shine.
3. Mechanical Elements: Brake discs need metallic dirt, suspensions residual oil, and the exhaust heat degradation.
For quick renders, Eevee with a circuit HDRI offers good results. If you're looking for maximum realism, Cycles X with optimized light paths for metals.
The Technical Curve: Mistakes That Will Throw You Off Track
1. Improvised Topology: Those triangular faces in curved areas will ruin your subdivision.
2. Incorrect Scale: A MotoGP has specific proportions – use real measurements.
3. Flat Materials: Nothing kills realism more than perfect plastics without imperfections.
4. Lack of Context: Add at least a simple track or pit wall in the background.
Checkered Flag: Taking It to the Next Level
Once you master the static model, animate these elements:
- Active Suspension: Create a simple rig to simulate compression in curves.
- Speed Effects: Motion blur and dust particles.
- Onboard Camera Shot: Like in the reference video, recreate that dynamic angle.
And remember: if Marc Márquez needs 25 years of practice to master the Sachsenring, don't get frustrated if your first bike model isn't perfect. Even champions started crashing in the first corner... or in our case, doing Apply All Transforms without saving a backup. 😅
Now fire up those digital engines and prove that in the 3D world you can also hit 350km/h... of polygons per second. 🚀