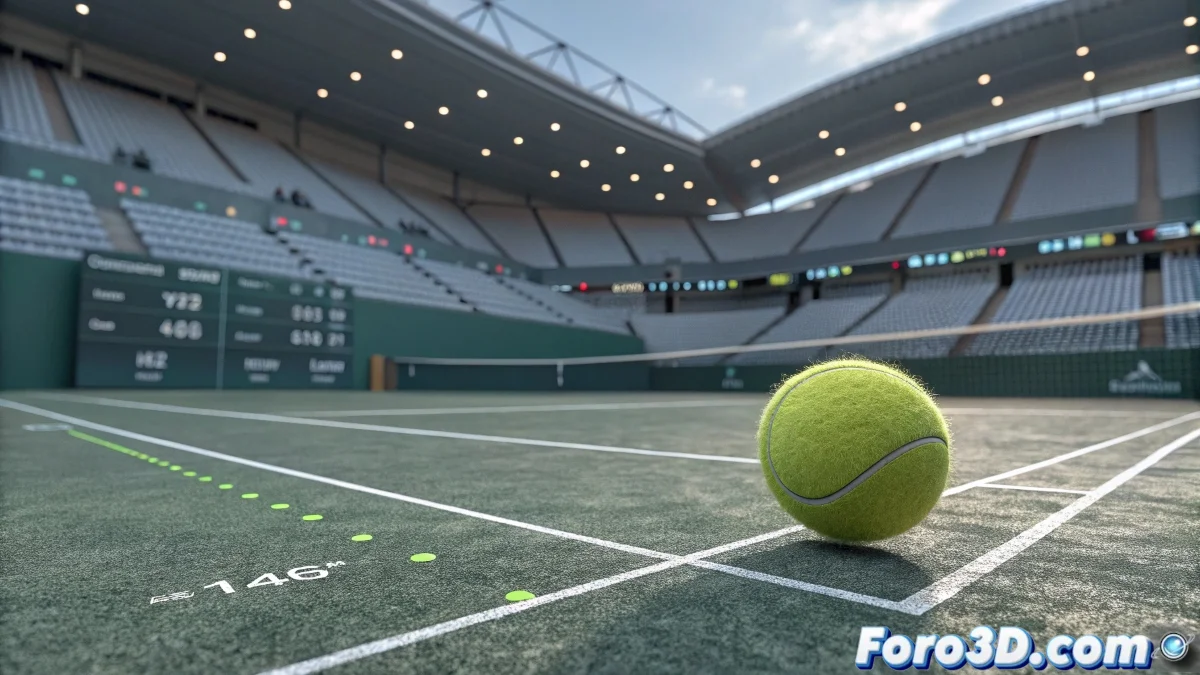
Creating the Tennis "Hawk-Eye" Effect in 3ds Max
The most controversial effect in tennis now in your renders! 🎾👁️ Let's turn your camera into the most precise judge on the digital court. Here we show you how to simulate that famous ball tracking effect that makes even the best players question it.
Professional Method for the Hawkeye Effect
To recreate this sports tracking system:
- Create an animated trajectory for your tennis ball
- Add a helper object that exactly follows the ball's position
- Use the Particle Flow modifier to generate the characteristic digital trail
- Apply glow materials for the technological visualization effect
"A good digital Hawk-Eye should make viewers ask 'How did they do that?' instead of 'What's happening?'"
Key Elements for Greater Realism
- Trajectory graphics: Use splines with growth animation
- Impact markers: Animated concentric circles on impact
- Digital HUD: Add interface elements with compositing
- Multi-camera effect: Simulate the different angles of the real system
For the technical part, the Position Constraint will be your best friend, keeping the tracking elements perfectly aligned with the ball. And if you want to take realism to the max, animate a slight delay in the system calculation, just like in real life! ⏱️
Remember that the magic is in the details: add some "digital noise" to the measurements and slightly vary the trail opacity. This way you'll avoid making your effect look too perfect (and therefore, fake). Time to render! And may the virtual judges be on your side. 🏆