How to Fix the Heating Failed Error in 3D Printing
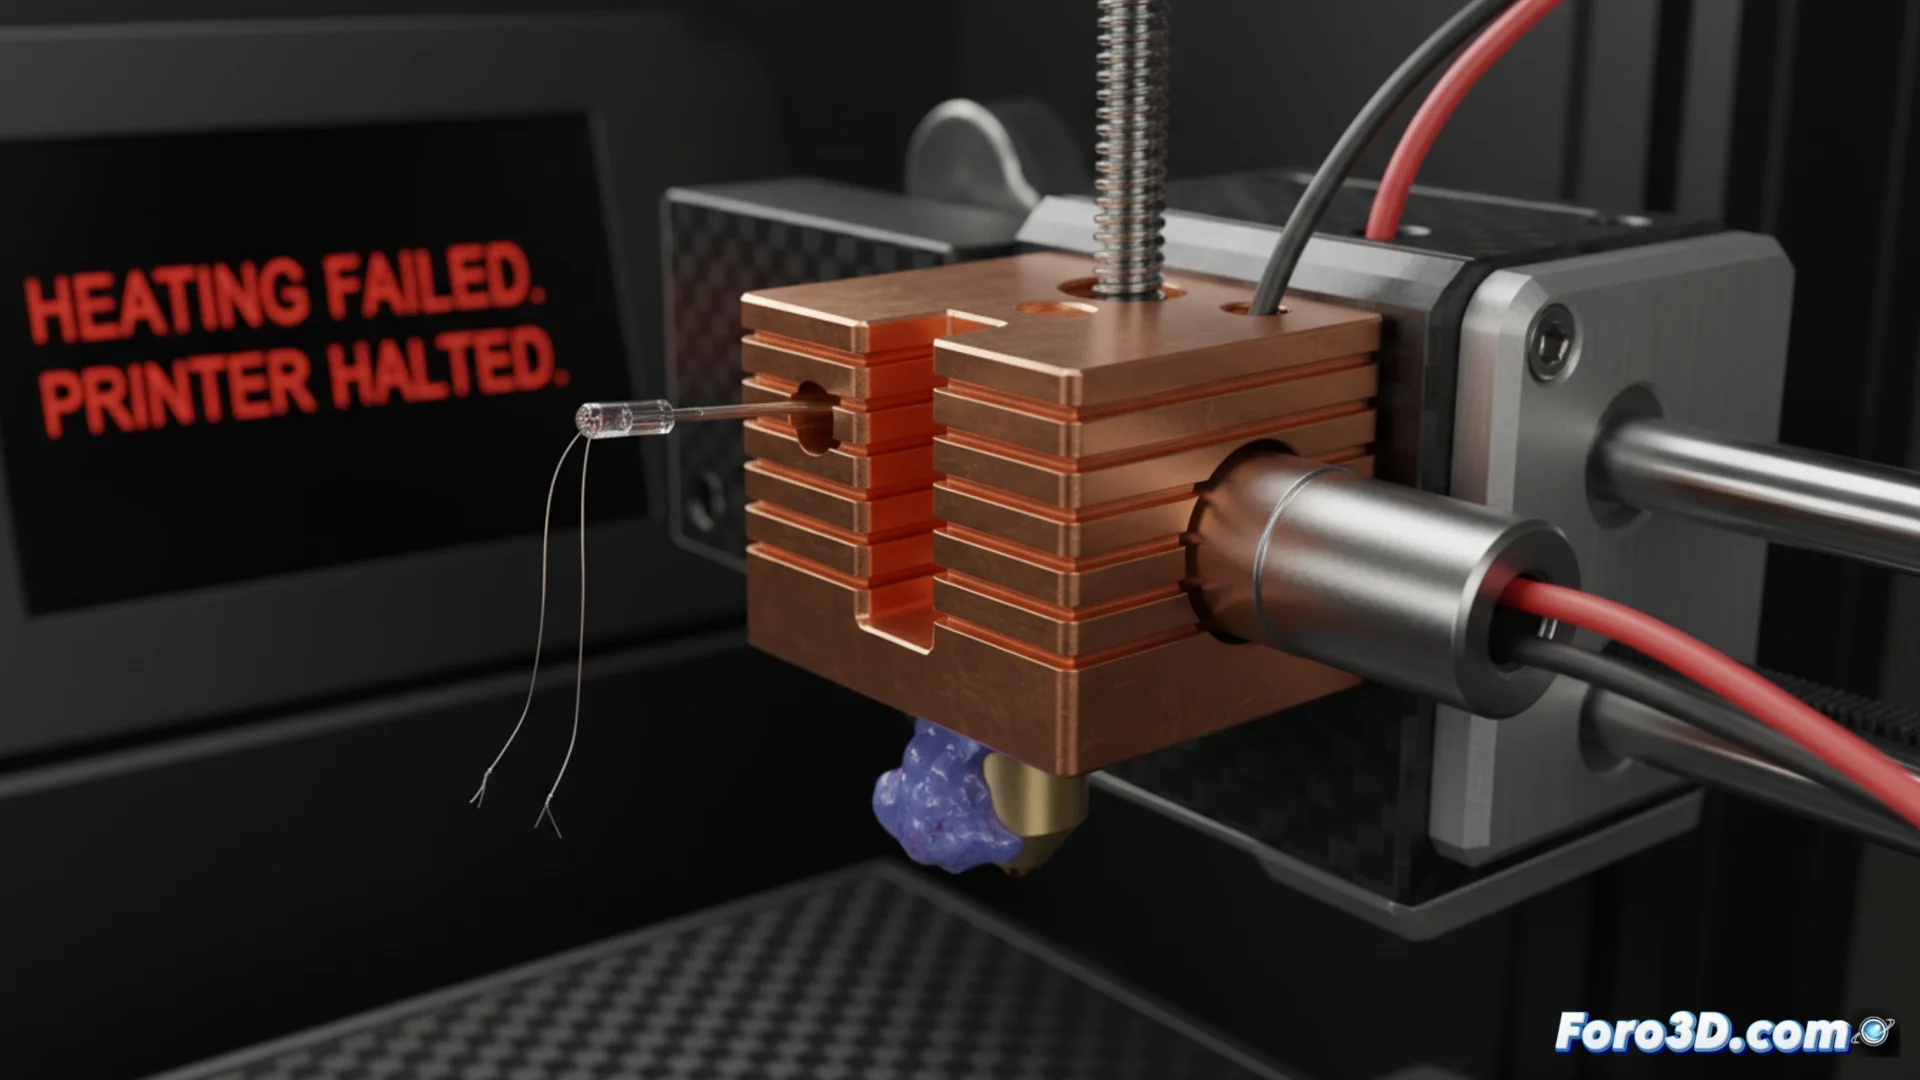
When your 3D printer displays the message Heating Failed or Heating Failed, System stopped! Heater_ID: 0, it means the nozzle couldn't reach the programmed temperature within the expected time frame. As a safety measure, the machine stops automatically to prevent major damage. This critical failure requires immediate action. 🔧
Diagnose the Source of the Problem
This safety error usually arises from a malfunction in one of these three elements: the thermistor (temperature sensor), the heating cartridge, or the power source. Identifying the faulty component is the first step to fixing it.
Initial Inspection Steps:- Always turn off and unplug the printer before touching any electrical components.
- Look for visible signs of damage, such as frayed wires, burns, or loose connections.
- Have a multimeter ready to measure resistances and continuity.
A thermistor giving false readings is the most common cause of a Heating Failed error. Don't underestimate a poorly adjusted connection.
Check and Test the Thermistor
The thermistor is responsible for measuring how hot the hotend is. If it fails, the electronics receive incorrect data and may think there's no heat even if there is. Start your diagnosis here.
Key Sensor Checks:- Ensure the thermistor is properly inserted into its hole in the heating block and that the fixing screw is tight (without overtightening).
- Carefully examine the sensor wires. Look for breaks, cuts, or detached solder joints near the connectors.
- Use the multimeter in resistance (ohms) mode to measure the thermistor. Compare the obtained value with the one specified by the manufacturer at room temperature.
- Clean any residue of molten filament that may be insulating the sensor, which would alter its reading.
Examine the Heater and Power Supply
If the thermistor works, the next suspect is the heating cartridge. This element is what physically generates the heat. You also need to confirm it receives enough power to do its job.
Testing Process:- Carefully remove the heating cartridge from the hotend. With the multimeter in continuity or resistance mode, measure between its two terminals.
- A resistance reading within the normal range (usually between 5 and 15 ohms, check your model) indicates the cartridge is good. An infinite value (open circuit) means it's burned out and must be replaced.
- Verify that the heater wires are firmly connected to the correct terminals on the main control board (mainboard).
- Evaluate the power supply. Confirm it is delivering the correct voltage (e.g., 12V or 24V DC) stably. A weak power supply or faulty power wiring can prevent the hotend from heating up quickly enough.
Conclusion and Final Steps
Resolving the Heating Failed requires a systematic method: check the sensor, then the heating element, and finally the electrical supply. Don't ignore the possibility of a "ghost" in the readings due to intermittent connections. After replacing or repairing the faulty component, perform a supervised heating test before resuming a long print. Keeping these elements in good condition is key to avoiding unexpected stops and protecting your equipment. 🚀