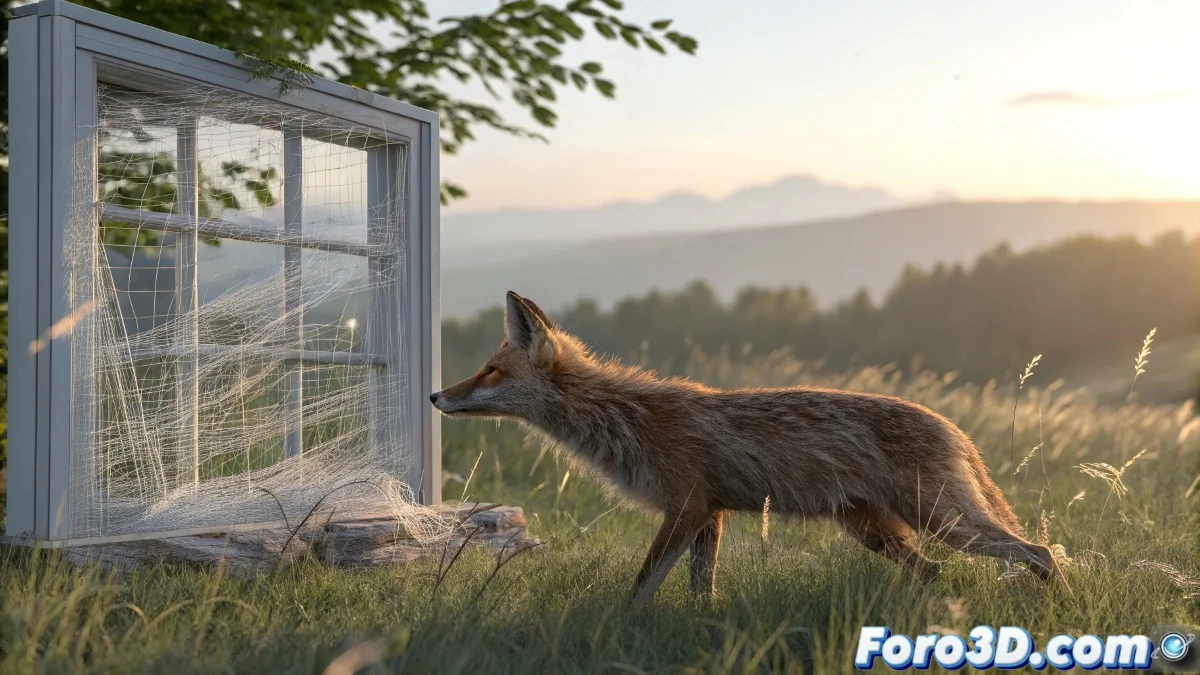
The Mystery of Invisible Fur Grass
This is a classic problem when working with Fur in Maya and transparent materials. The Fur Grass seems to magically disappear when viewed through a window, leaving a ghostly halo that frustrates any attempt to create realistic scenes. The problem is not in the Fur or the window material separately, but in how they interact during the rendering process.
What happens is that Maya's ray tracer has trouble correctly calculating the intersection between light rays, transparent surfaces, and Fur systems. Without the proper setup, the renderer simply skips the Fur when it detects it's behind a transparent material, considering it an optimization when it's actually a visualization issue.
In Maya, Fur behind glass is like a shy actor who exits the stage when the lights come on
Window Material Setup
The first step is to review and adjust the window material. Standard transparent materials may need specific parameters to allow Fur visibility.
- Refraction enabled: ensure transmission is greater than 0
- Total Transparency: transmission color in pure white
- Correct IOR: 1.5 for standard glass
- Exit Color: disabled or black
Fur Render Attributes
Maya's Fur system has specific attributes that control its behavior during rendering. Some of these may be limiting visibility through transparent surfaces.
In the Fur Description attributes, look for the Render Settings section and verify that depth and sampling options are set correctly 😊
- Fur Render Options: in the Fur Description node
- Hair Samples: increase to 4-8 for better quality
- Fur Render Precision: high or medium-high
- Auto-Shadowing: disable temporarily for testing
Critical Ray Tracing Settings
The most effective solution is usually in the render's Ray Tracing settings. Maya needs to correctly calculate light paths through transparent surfaces.
In Render Settings, go to the Ray Tracing tab and increase the reflection and refraction limits. Values that are too low cut the calculation prematurely.
- Reflections: minimum 4, preferably 6-8
- Refractions: minimum 6, preferably 8-12 for glass
- Max Trace Depth: sum of reflections + refractions
- Shadow Rays: increase to 2-3 for soft shadows
Camera and Clipping Setup
In some cases, the problem may be related to the camera's clipping planes. If the Fur is too close or too far, it may not render correctly.
Check your render camera's Near Clip Plane and Far Clip Plane. Extreme values can cause very small geometry like Fur to disappear.
- Near Clip Plane: 0.1-1.0 for normal scenes
- Far Clip Plane: sufficient to cover the entire scene
- Orthographic Views: avoid if there are depth issues
- Camera Scale: check if it's not too small
Technique with Alternative Render Layers
If the previous adjustments don't fully resolve the issue, consider using separate render layers for the Fur and the window.
Render the Fur in a separate layer without the window, and the window in another layer without the Fur. Then composite both in post-production.
- Render Layer for Fur: without the window object
- Render Layer for window: only the transparent material
- Post Composition: use alpha channels and depth
- Blending Adjustment: blending modes for integration
Visibility Attributes Check
Maya has multiple levels of visibility control that may be affecting the render. Verify that all are set correctly.
Check both the render visibility attributes in the shape node and the visibility flags in the display layer and the object itself.
- Render Stats: in the window's shape node
- Primary Visibility: enabled for all objects
- Casts Shadows: enabled for window and Fur
- Receive Shadows: enabled for the ground and Fur
Solution with mental ray (if applicable)
If you're using mental ray instead of Arnold, the required settings are different. Mental ray has its own system for handling hair and transparencies.
In mental ray, look for ray marching parameters and increase samples for dielectric materials and hair systems.
- mia_material Unit: use architectural instead of standard
- Trace Depth: increase in mental ray render settings
- Final Gathering: enable for better indirect lighting
- mia_material x_passes Unit: check in multi-render
Optimization for Efficient Rendering
The suggested settings can significantly increase render time. These strategies will help you maintain efficiency.
Use region rendering to test only the problematic area during development. Once solved, apply the settings to the full render.
- Region rendering: for quick tests
- Low quality preview: during development
- Progressive rendering: to see partial results
- Fur Cache: pre-calculate for multiple renders
Diagnostic Workflow
Follow this systematic process to identify and resolve the issue. Start with the simplest and progress in complexity.
Create a minimal test scene with just a simple window and a small Fur patch to isolate the problem.
- Step 1: Minimal scene with plane as window and basic Fur
- Step 2: Apply basic Ray Tracing adjustments
- Step 3: Verify materials and render attributes
- Step 4: Transfer solution to main scene
After applying these solutions, your Fur Grass should be perfectly visible through the windows, creating that realistic halo that completes your scene... though you'll probably now notice other details you want to improve, but that's the nature of 3D work 🌿