From Bones to Skin with Realistic Simulation in Maya's Muscle System
When you dive deep into the world of advanced rigging in Maya, especially if you come from doing more basic rigging with just Skinning and joints, it's easy to feel like you've just opened a door to a parallel universe. Suddenly terms like Skin Mesh, Skeleton Rig, and Muscle Rig appear, and things start to sound more like an anatomy class than 3D animation. But don't worry, I'll explain how this whole mess fits together here. And no, you don't need to be an anatomy expert to understand it! 🦴
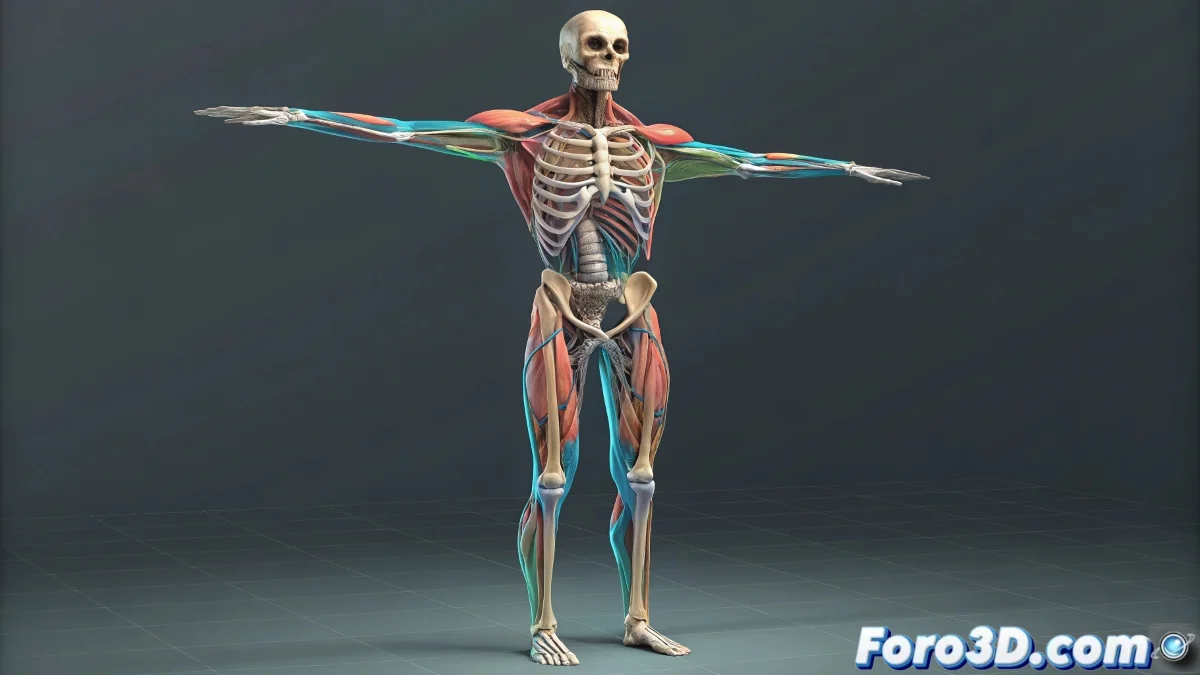
What is the Skin Mesh?
The Skin Mesh is nothing more than the final geometry of your character. It's the visible mesh you are going to render. The one with textures, materials, and shaders, and that will end up starring in your renders or animations within Arnold, V-Ray, or Redshift. The Skin Mesh is what gets deformed at the end of the pipeline, and it receives the deformations caused by the bone and muscle system.
What is the Skeleton Rig?
The Skeleton Rig or skeleton is the system of joints or bones that act as the internal structure of the character. This skeleton is what moves everything: from the position of a finger to the head or torso. In Maya, it's normal to first build the skeleton using joints and then apply Skinning to connect that skeleton with the mesh.
What is the Muscle Rig?
This is where the fun (and more complex) part begins. The Muscle Rig is an intermediate layer that simulates the behavior of real muscles: their expansion, contraction, and sliding under the skin. In Maya you have the Maya Muscle system, which allows you to create muscle objects (Muscle Objects), apply them as deformers, and run simulations so the skin reacts as it would on a human or creature.
How do they interact with each other?
- The Skeleton Rig moves the muscles. Each muscle is linked to one or several joints in the skeleton.
- The Muscle Rig deforms the base mesh of the muscles, generating simulations of mass, collision, and stretch.
- The Skin Mesh is deformed based on the muscles using a system of deformers or directly the Muscle Deformer in Maya.
- The skin responds dynamically to muscle movement, achieving effects like realistic sliding, jiggle, or squash and stretch.
Tips for Getting Started with the Muscle System in Maya
- Always work in the latest version of Maya, where the muscle system has better collision and simulation options.
- Study the flow: first skeleton rig, then muscles, and then skinning with muscle influence.
- Don't forget to do tests with real playback, because the simulation might look good statically but break in motion.
And by the way… when you manage to get your character's bicep muscle to have perfect jiggle in the render… don't forget to post it on your social media. Nothing like a bit