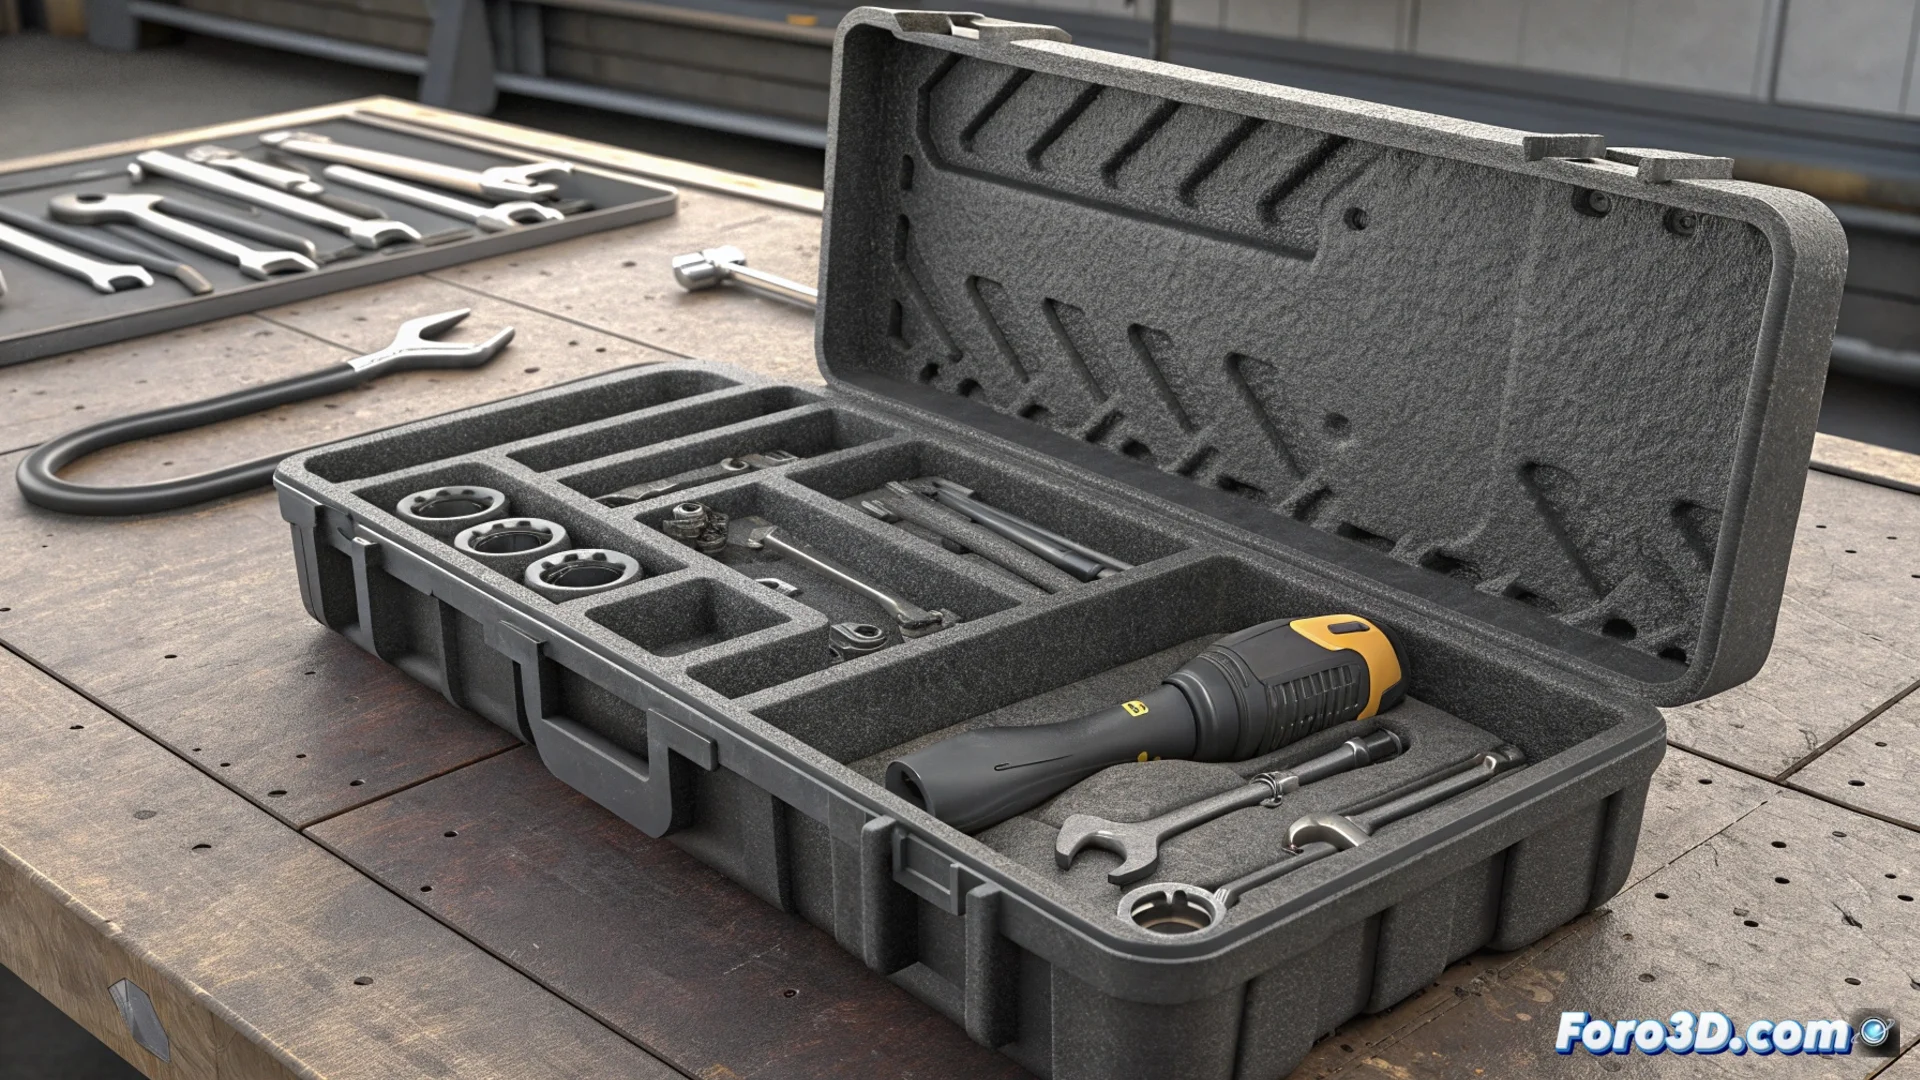
Design and Manufacture a Toolbox with Custom Compartments
Tired of searching in a messy box? Creating a custom organizer for your tool set is a feasible project. The key method consists of capturing the exact shape of each wrench or screwdriver to then generate a digital model. This file allows designing a box with cavities that are the negative of each piece. The final result is a storage system where nothing rattles and every object has its fixed place. 🛠️
Capture the Geometry of Your Tools
To start, you need to digitalize the tools. You can do this with a 3D scanner, which records complex geometry quickly, or through manual measurement with a caliper or micrometer. This second method takes more time but is equally precise. The data you obtain, whether a point cloud or a set of measurements, is imported into CAD design software. In this environment, you will generate a solid that represents the volume of each tool. This solid is the tool for carving the hollows in a virtual block that will become the base of your box.
Two ways to digitalize:- 3D Scanning: Fast and precise for organic or complex shapes. Ideal if you have access to the hardware.
- Measurement with Caliper: Accessible and meticulous method. Perfect for prismatic or cylindrical shapes like wrenches.
- Photogrammetry: An alternative using multiple photos from different angles to reconstruct the 3D model.
Precision in this phase is crucial: it defines how tight and satisfying the final fit of each tool in its compartment will be.
From Digital Model to Physical Object
With the box modeled and all its compartments defined, the next step is to prepare the file for 3D printing. The model's orientation on the printer is fundamental. You must place the design so that the openings of the hollows face upwards. This strategy avoids generating support structures inside the cavities, which greatly facilitates post-printing. For this project, it is recommended to choose a durable filament like PETG or ABS, which offer good durability and impact resistance.
Key considerations for printing:- Orientation: Hollows facing up to eliminate internal supports and achieve a clean finish.
- Material: PETG for its balance between ease of printing and strength, or ABS for maximum durability.
- Infill: A percentage between 20% and 40% is usually sufficient to provide rigidity without wasting extra material.
Advantages and the Only Drawback
Upon removing the piece from the print bed, you will have a perfect storage solution. Each tool will fit into its hollow with a satisfying click, eliminating noise and wear from friction. The organization is permanent and visually clear. However, there is one real problem: when you add a new tool to your collection. This breaks the harmony of the system, forcing you to decide between designing and printing an updated new box or living with the constant reminder of an empty hollow. It is the price of custom perfection. 🔧