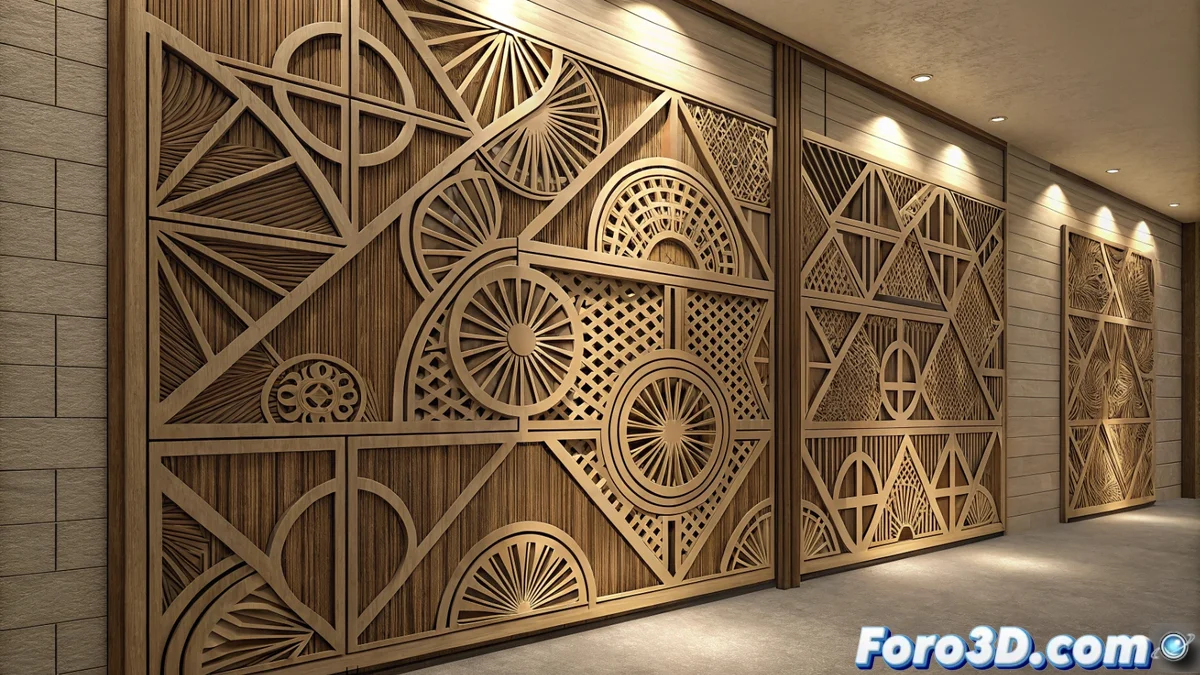
Creating Modular Murals with a Laser Cutter
Transforming a wall with a custom modular mural is an accessible project with a laser cutter. This technique allows producing decorative panels that combine to cover large surfaces, adapting to the exact dimensions of any space. The process integrates digital design and precise manufacturing for a unique result. 🎨
Planning the Design and Selecting the Material
The first step is to define the base pattern that will be repeated in each module. It is crucial that the edges of the panels fit perfectly to achieve a continuous effect. The choice of material is fundamental: wood provides natural warmth, while acrylic allows playing with transparency and light. You must verify that the material thickness is compatible with your laser's power. To prepare the files, vector design programs like Inkscape or Adobe Illustrator are used.
Key points in the design phase:- Design an interlocking module: Create a pattern whose edges allow fluid assembly without visual interruptions.
- Choose the right material: Evaluate the aesthetic and technical properties of wood versus acrylic for the project.
- Prepare vector files: Use specialized software to generate the cutting paths that the laser machine will execute.
The biggest challenge is sometimes not designing the pattern, but knowing where to stop before the wall looks like a luxury Gruyère cheese.
Executing the Cut and Organizing the Assembly
With the files ready, the laser cutter performs the cuts with extreme precision and clean edges. After this process, it is necessary to remove the pieces and clean them of any residue. Before fixing anything to the wall, it is recommended to organize the final composition on the floor. This allows visualizing the whole and making adjustments. The modules can be joined to each other or placed individually.
Steps for assembly:- Cut precisely: The laser machine executes the design, ensuring complex details and sharp edges.
- Clean and prepare modules: Remove the pieces from the cutting bed and eliminate burn marks or dust.
- Assemble with hidden system: For a continuous mural effect, use clips or mounting rails that are not visible.
Achieving a Custom and Coherent Mural
The final result is a totally customized decorative piece that scales to fill the desired wall. The key lies in the coherence of the modular pattern and careful mounting that disguises the joints. This method not only allows adapting the design to the space, but also experimenting with shadows, depth, and materials to create a unique visual impact. Meticulous planning from digital design to physical installation is what ensures the success of the modular mural. ✅